Using Ventoy to Create a Universal Bootable USB Drive
Using Ventoy to Create a Universal Bootable USB Drive
Friends who often install operating systems should be very familiar with making bootable drives, as it is a necessary step every time an operating system is installed. If the operating system to be installed is different from the previous one, then the bootable drive has to be made again.
Is there any tool that can get this job done once and for all, thus bidding farewell to the complicated steps of making a bootable drive? There really is such a tool, which is the "bootable drive making magic tool Ventoy" to be introduced in this article!
Download Ventoy
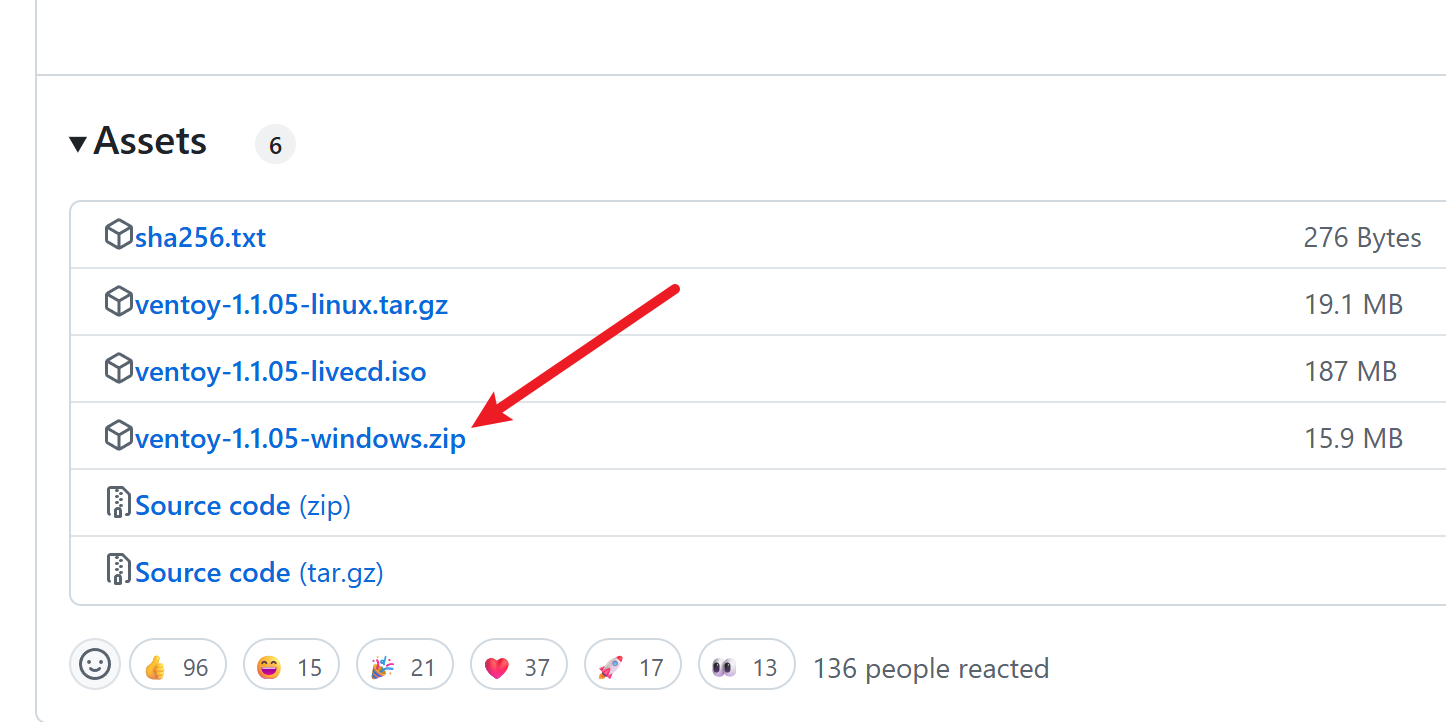
Although Ventoy can also be downloaded from its official website, the speed is very slow. It is recommended to download it through the Github link. When downloading, choose the proper compressed package for you system(I think for most people the choice would be windows).
After the download is completed, extract the file. Locate Ventoy2Disk.exe, and you can launch the Ventoy main program.
Feature Introduction
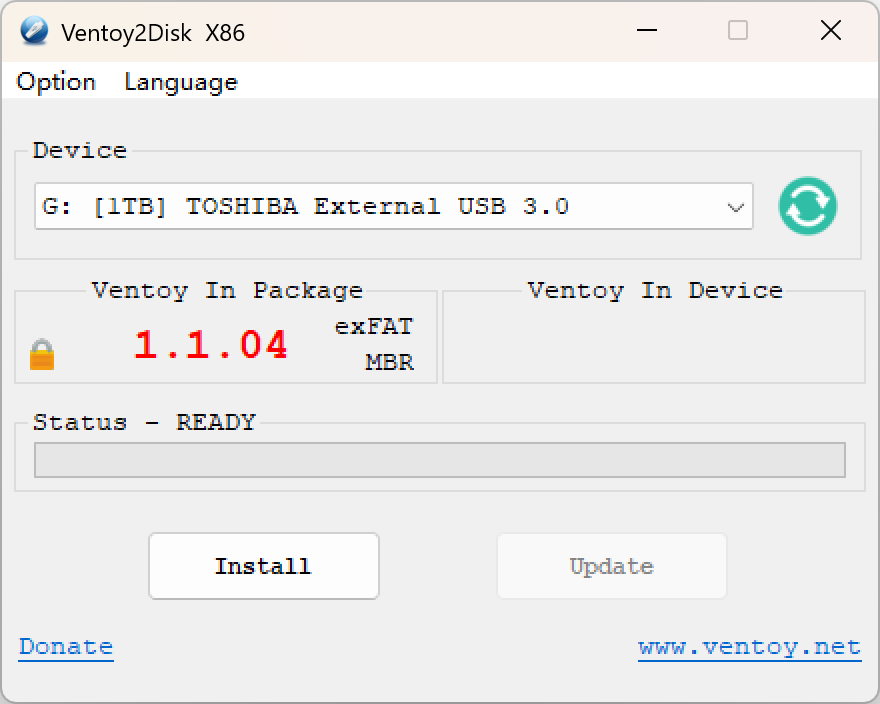
When you open Ventoy, you should see an interface similar to the following figure.
- Some function items can be set in the menu bar.
- The device section lists the current USB drive devices. If they are not displayed, you can unplug and replug the USB drive, and then click the refresh button on the right to check.
- The section below the device lists the current local Ventoy version and the Ventoy version installed in the USB drive. If you have downloaded a new version of Ventoy, you can click the Upgrade Button below to update the version in the USB drive.
Getting Started
Creating a Bootable USB Drive
First, insert your USB drive and open Ventoy. If you're using it for the first time, only the local Ventoy version should be displayed.
Click on the Configuration Options menu, select Secure Boot Support, and then click the installation button below to create a Ventoy bootable USB drive. Note that this operation will erase all data on the USB drive. Make sure there is no important data on the USB drive before proceeding.
If Ventoy has been installed previously and you want to upgrade it, there's no need to worry. Ventoy upgrades will not affect local data, and you can upgrade it directly.
Adding System Images
Okay, now the Ventoy bootable USB drive has been created. That's it? Yes, it's that simple!
Now open the file manager, and you should see a USB drive named Ventoy. This is your bootable drive.
What you need to do next is simple. Just directly copy all the system image files you need (with the file extension .iso) to the USB drive. You can place multiple versions of Windows systems such as Win7, Win10, Win11, and PE at the same time, and even Linux can be put in. Ventoy supports them all! You no longer need to frequently create system bootable drives!
Moreover, the USB drive can not only store image files. You can completely use it as an ordinary USB drive to store music, videos, documents, etc. Only when the computer is restarted and the USB drive is set as the first boot item in BIOS will it be used as a bootable drive.
Booting
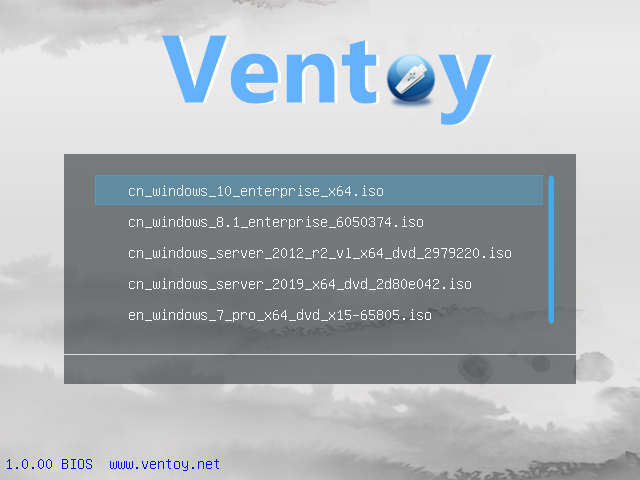
Restart the computer and enter the BIOS. Set Ventoy as the first boot item. Then you can enter the Ventoy boot interface. All the system images in Ventoy will be listed here. Use the cursor keys to select the image you want to boot and press Enter to start the system image.
Extended Reading
System Download
It is recommended to download the Windows image file on Microsoft Official Website. Since systems such as Win7 and Win8 have ceased to be supported, only Win10 and Win11 systems are recommended for download and installation at present.
After the download is completed, put the system image into the Ventoy boot disk, and then it can be started. After the download is completed, it is recommended to verify the image file first to ensure its accuracy before installation.
Verifying the Image
When downloading relatively large files such as system images, the download provider usually provides a set of verification codes, which look like a string of random characters. Its function is to confirm whether the downloaded file is complete and accurate. With the relatively good network conditions nowadays, the probability of download errors is relatively low, but transmission problems may still occur, resulting in errors in the downloaded file. For safety's sake, if the official provides a verification code, it is best to verify it after the download is completed to ensure that the file has no errors. If the file is incorrect, it can only be downloaded again.
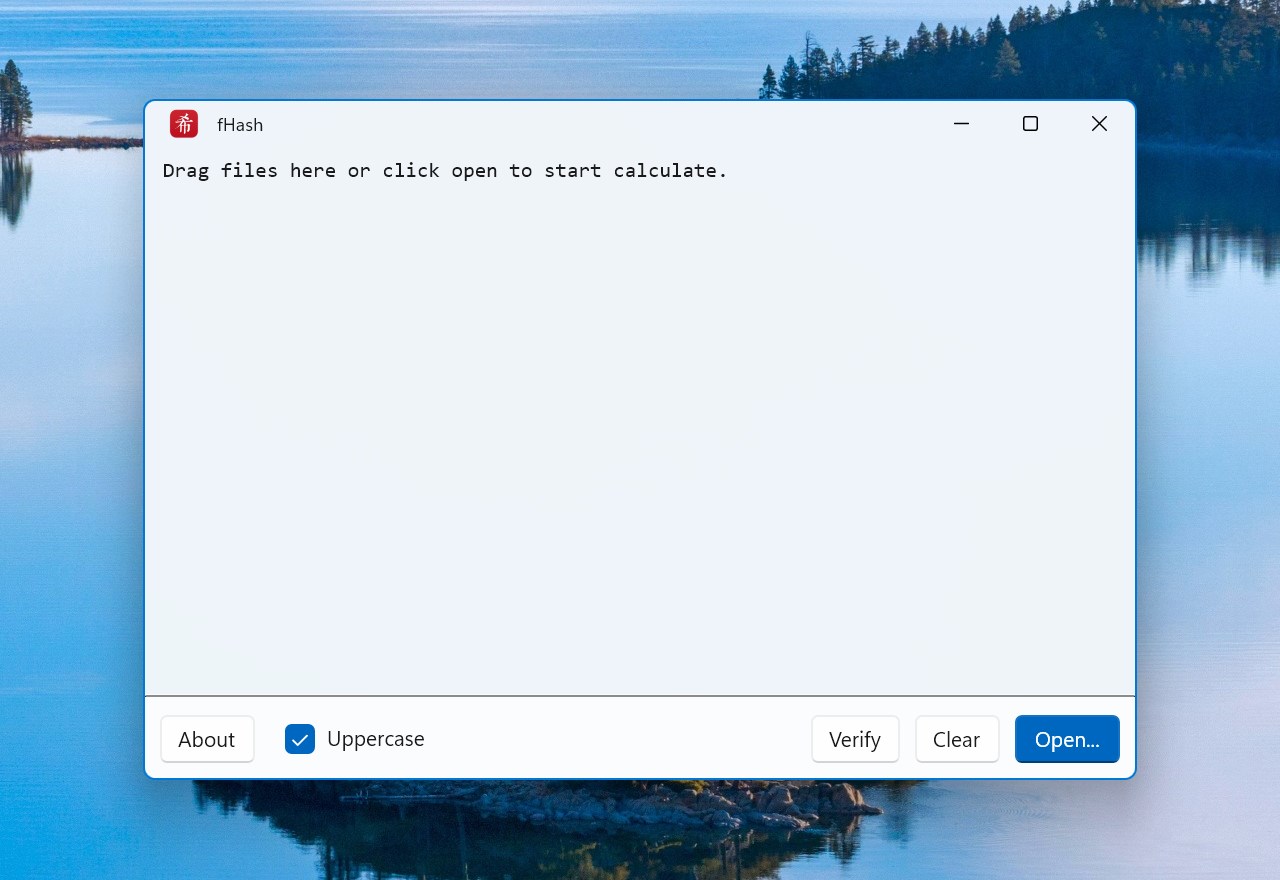
Here, the graphical tool fhash is recommended, which can be installed directly from the Microsoft Store. After the installation is completed, drag the large file to be verified in. After the calculation result comes out, compare it with the verification code provided by the official. If they are exactly the same, it means the file is fine. MD5, SHA1 and SHA256 are all types of verification algorithms, and it is sufficient to compare any one of them.