KeePassXC Password Manager
KeePassXC Password Manager
KeePassXC is a free and open-source password manager with a wealth of powerful features to strongly protect your passwords. If you have registered many accounts, can't remember your passwords, and often need to reset them, you should definitely try KeePassXC. It will ensure you never have to worry about forgetting your passwords again!
Getting Started
Download and Install
First, go to the official website to download and install KeePassXC.
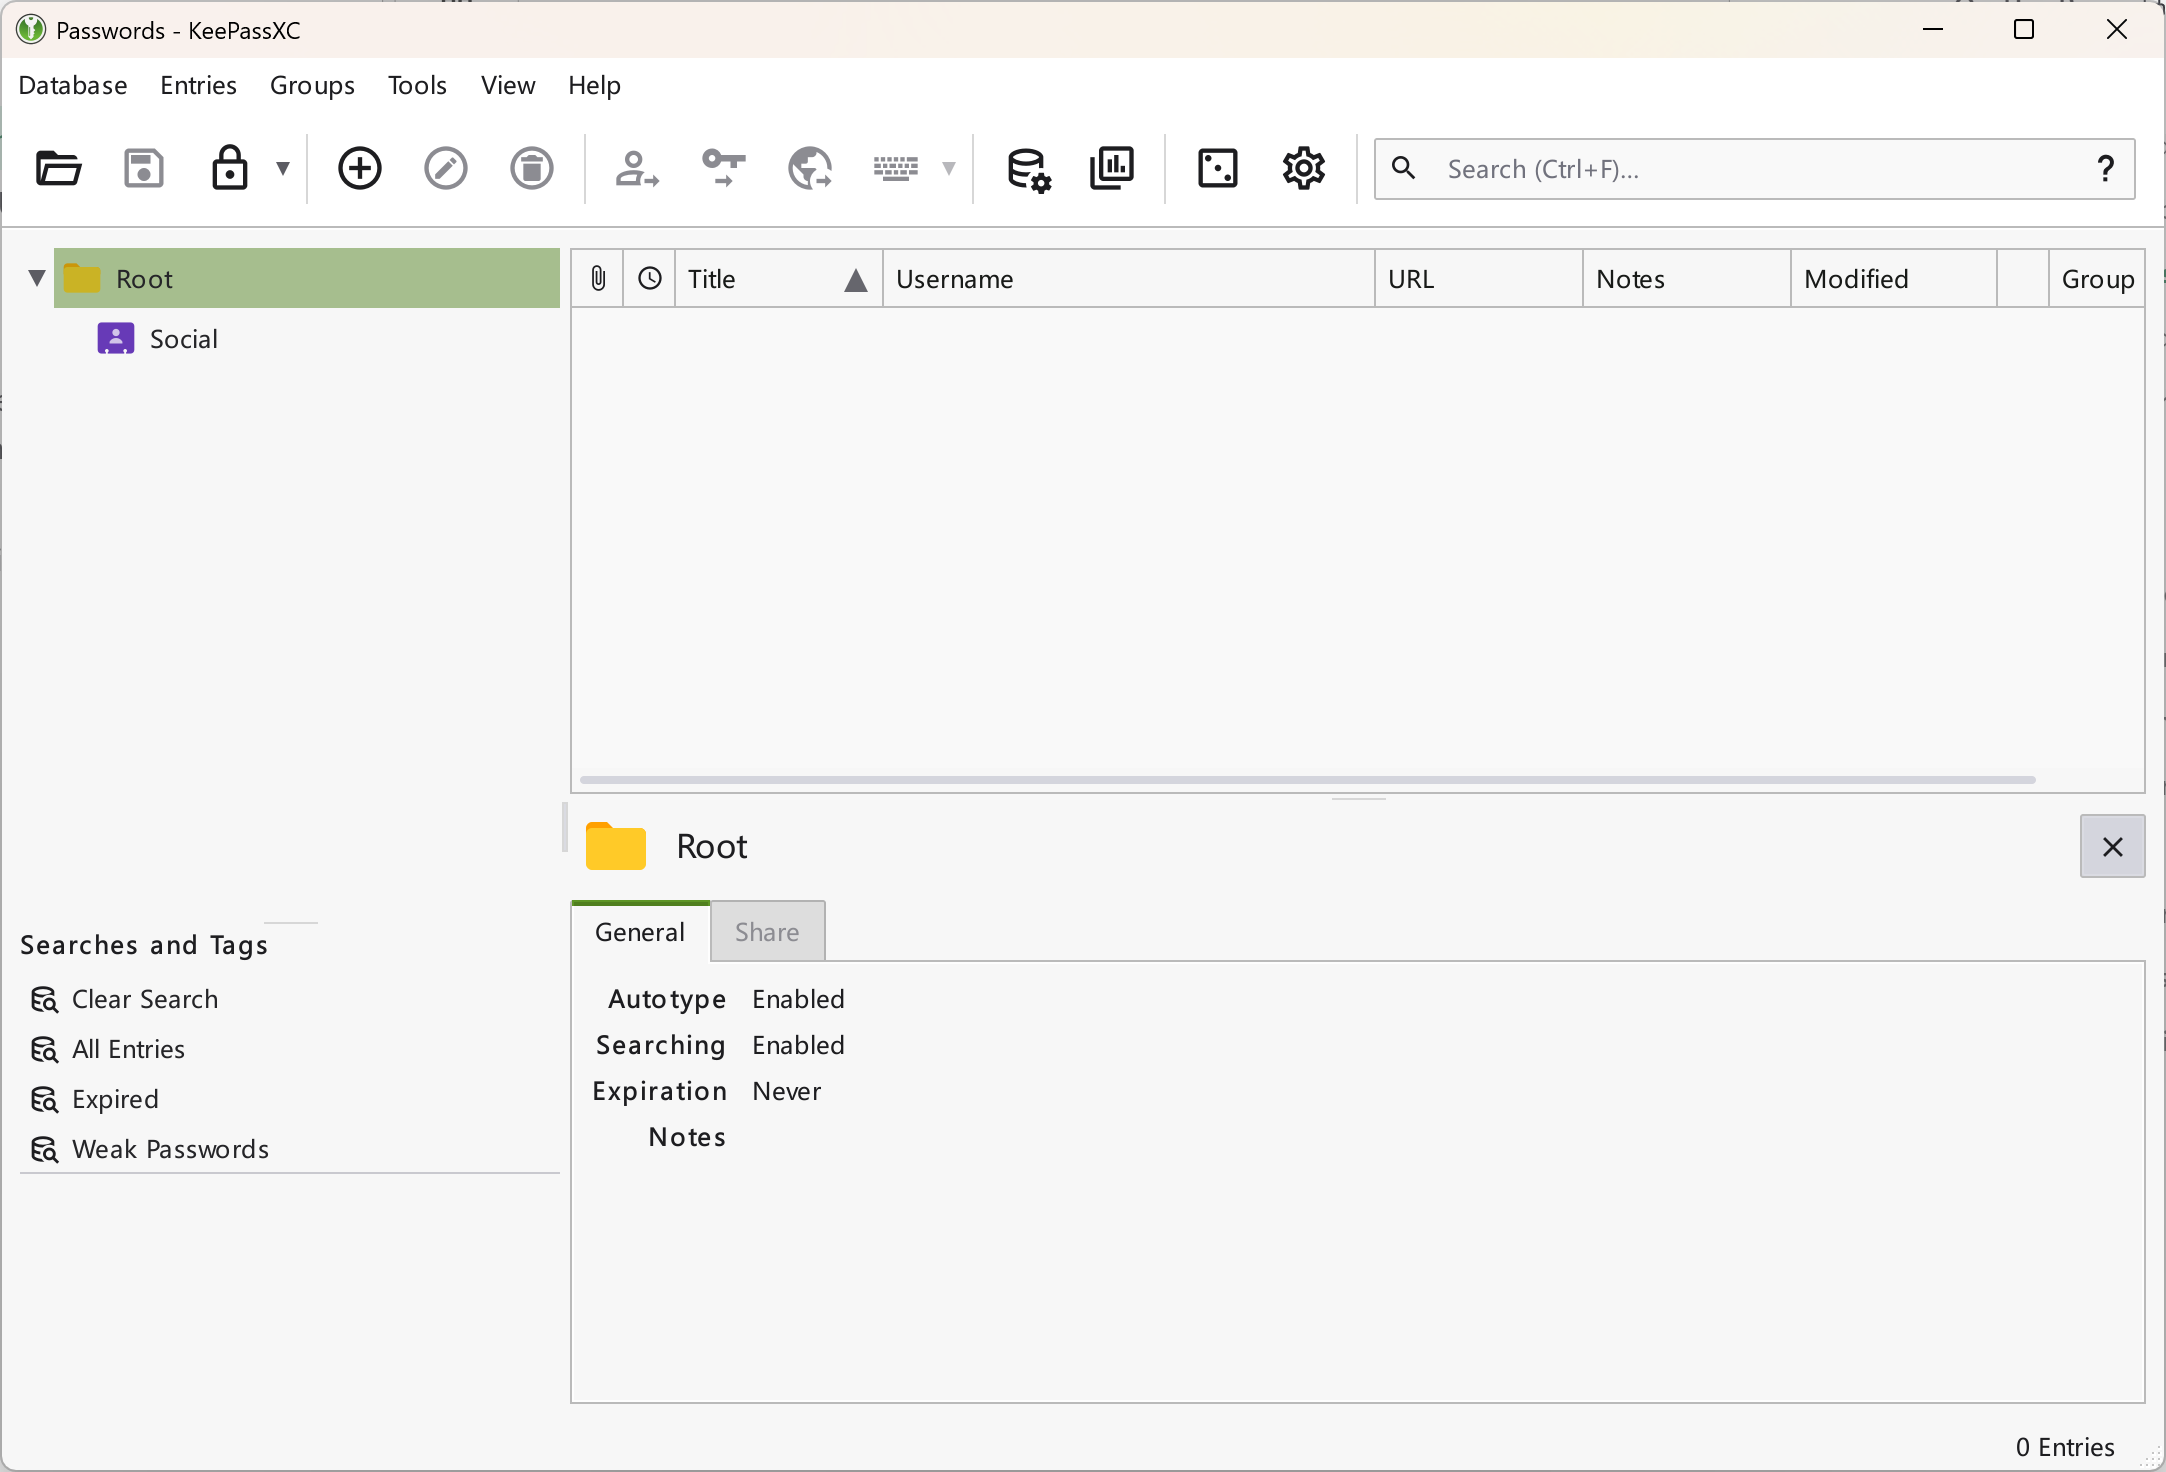
Create a Database
Open the KeePassXC software, and you should see a similar interface. Before using it for the first time, you need to create a database. All your passwords will be securely stored in the database in an encrypted form. Even if the database is leaked, your passwords will remain protected.
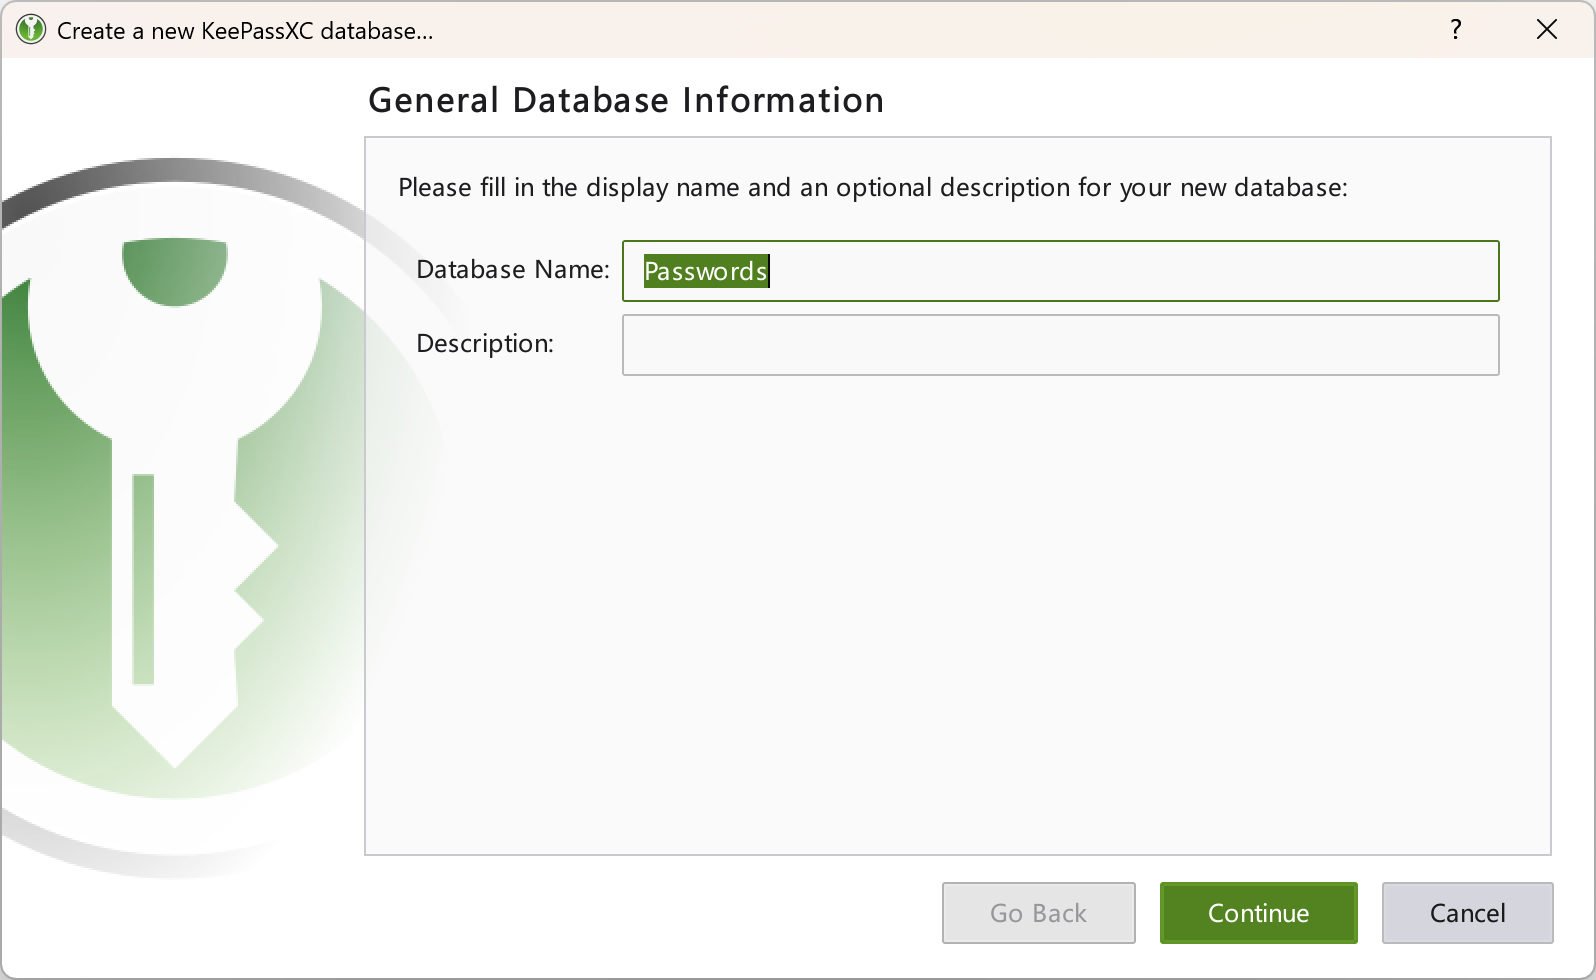
Click the "New Database" button in the interface to open the dialog. First, give your database a name — there are no strict requirements, just name it as you like.
Next, you need to set the database format and encryption settings. The default configuration is optimal, so you don't need to change anything here. Unless you have special requirements, the default decryption time of 1 second is sufficient. A longer decryption time uses more transformation rounds, making the database more secure, but it will also take longer to open and save.
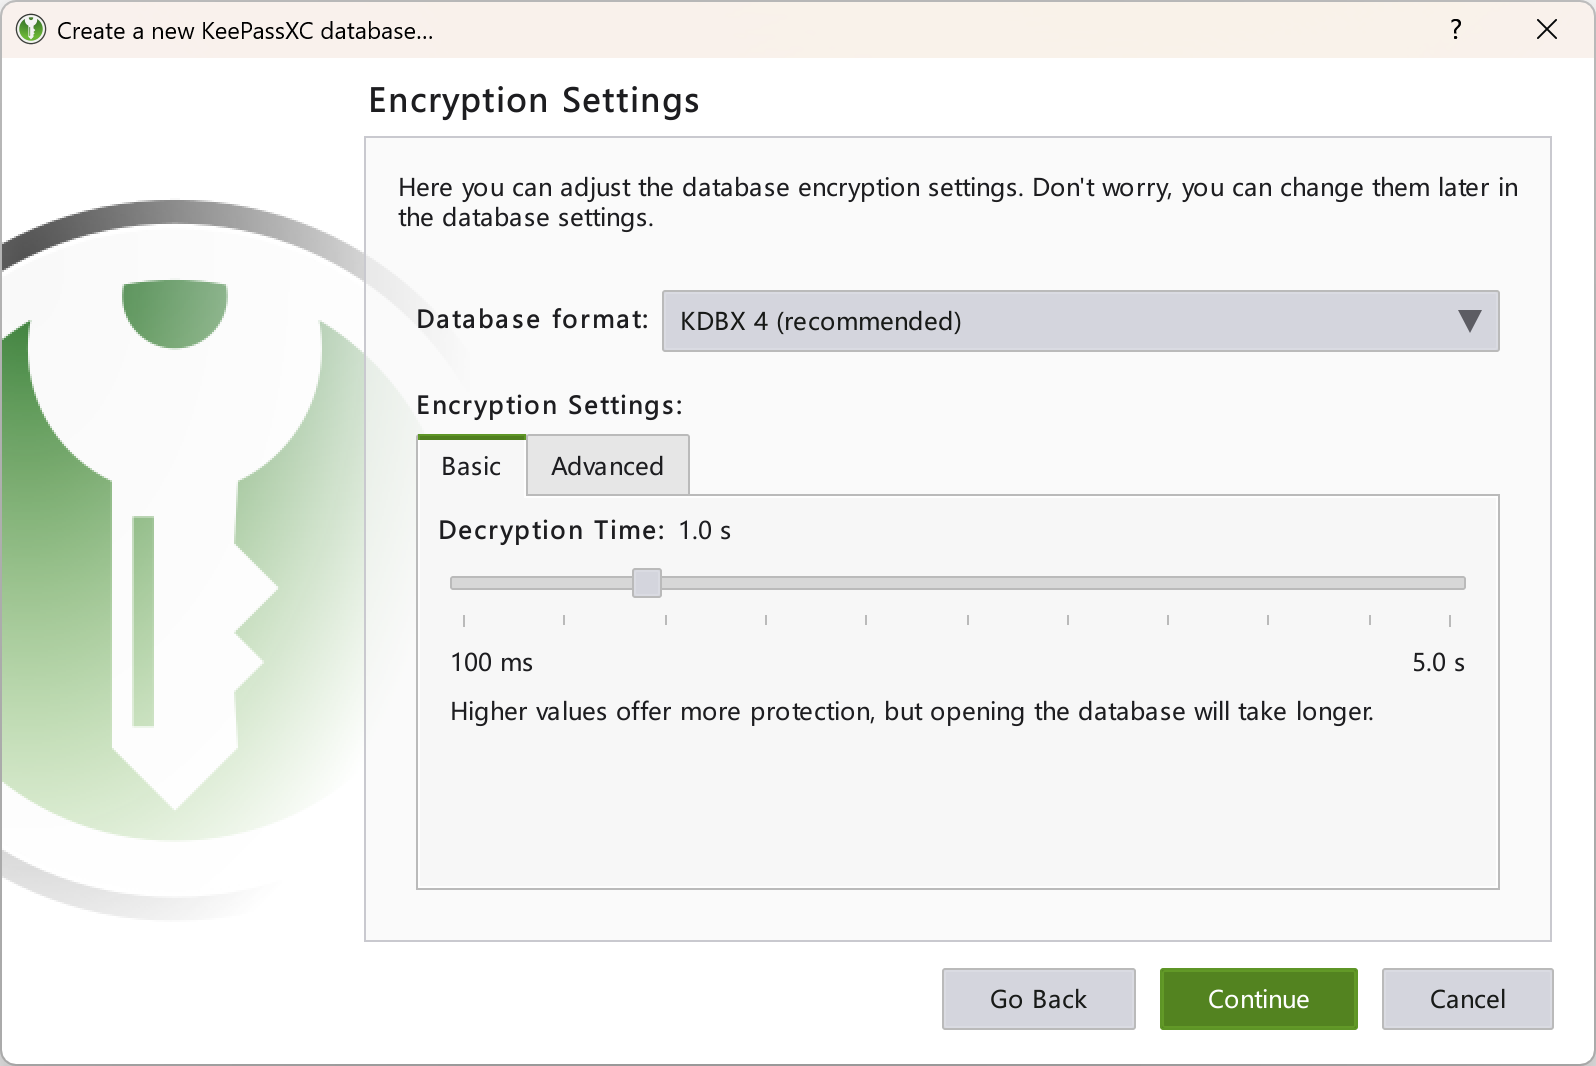
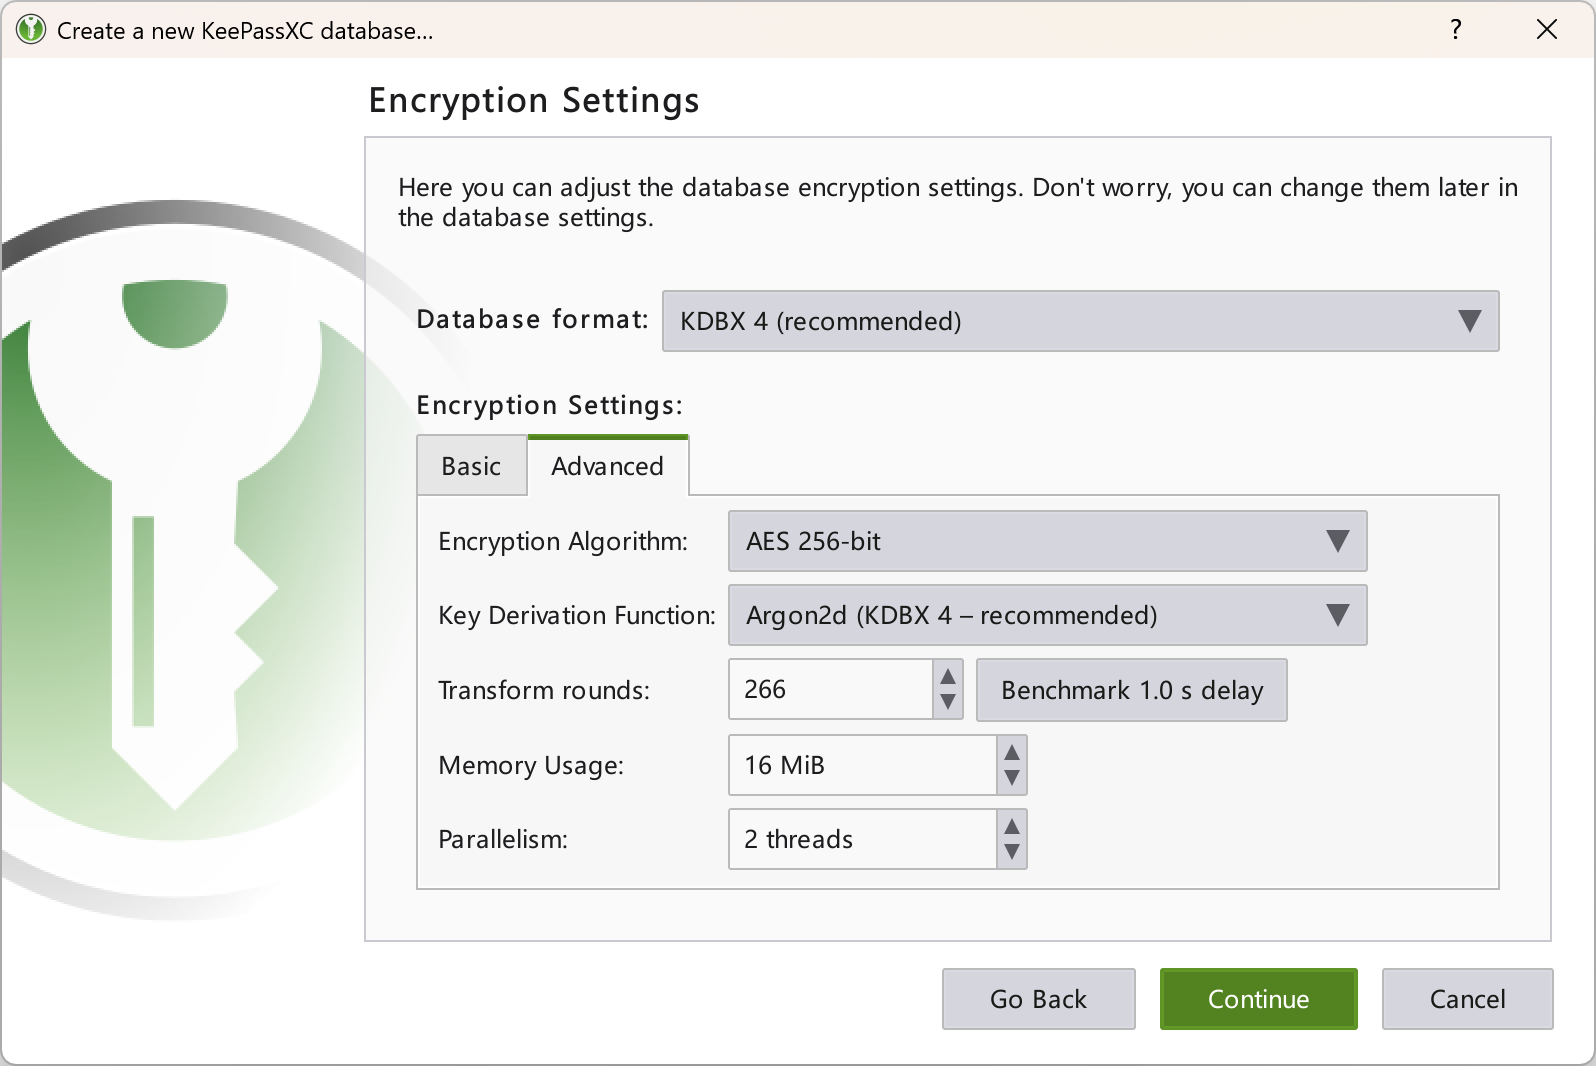
If you're interested, you can click "Advanced Settings" to modify the encryption algorithm and transformation rounds yourself. Different configurations require different amounts of time. After configuring, don't forget to click the "Benchmark 1 Second Delay" button to calculate the number of rounds needed for a 1-second delay based on your pc specs and device performance.
Finally, you need to set a password for the database. Every time you use KeePassXC, you must enter this password to open the database. If you forget the password, you will permanently lose access to the database, so be sure to remember it!
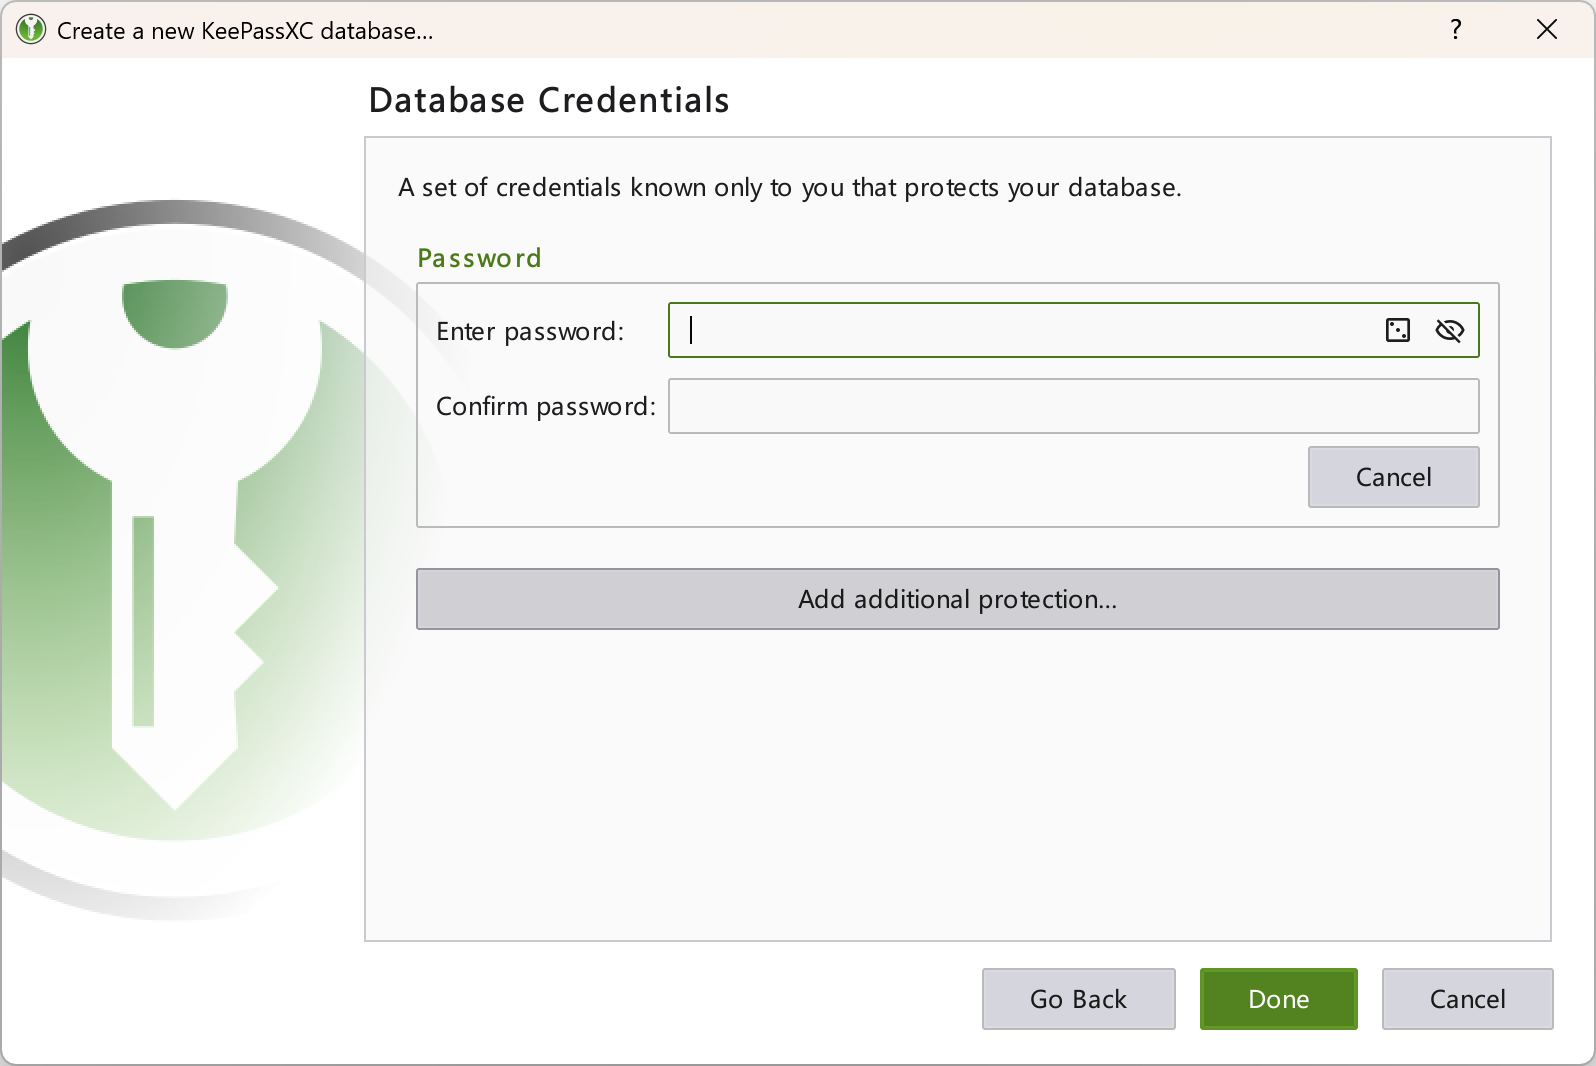
If you are sure that no one else uses your computer and you don't want to enter a password every time you open KeePassXC, you can use a "lazy" method, but this will reduce security. This method is to use only a key file to encrypt the database. In the password setup dialog, select "Add Additional Protection," choose "Add Key File," then click "Generate" to create a key file with the .keyx extension. If you use only this file to encrypt the database, you won't need to enter a password next time — just click once. However, if someone else uses your computer, they can also access all your account information without a password.
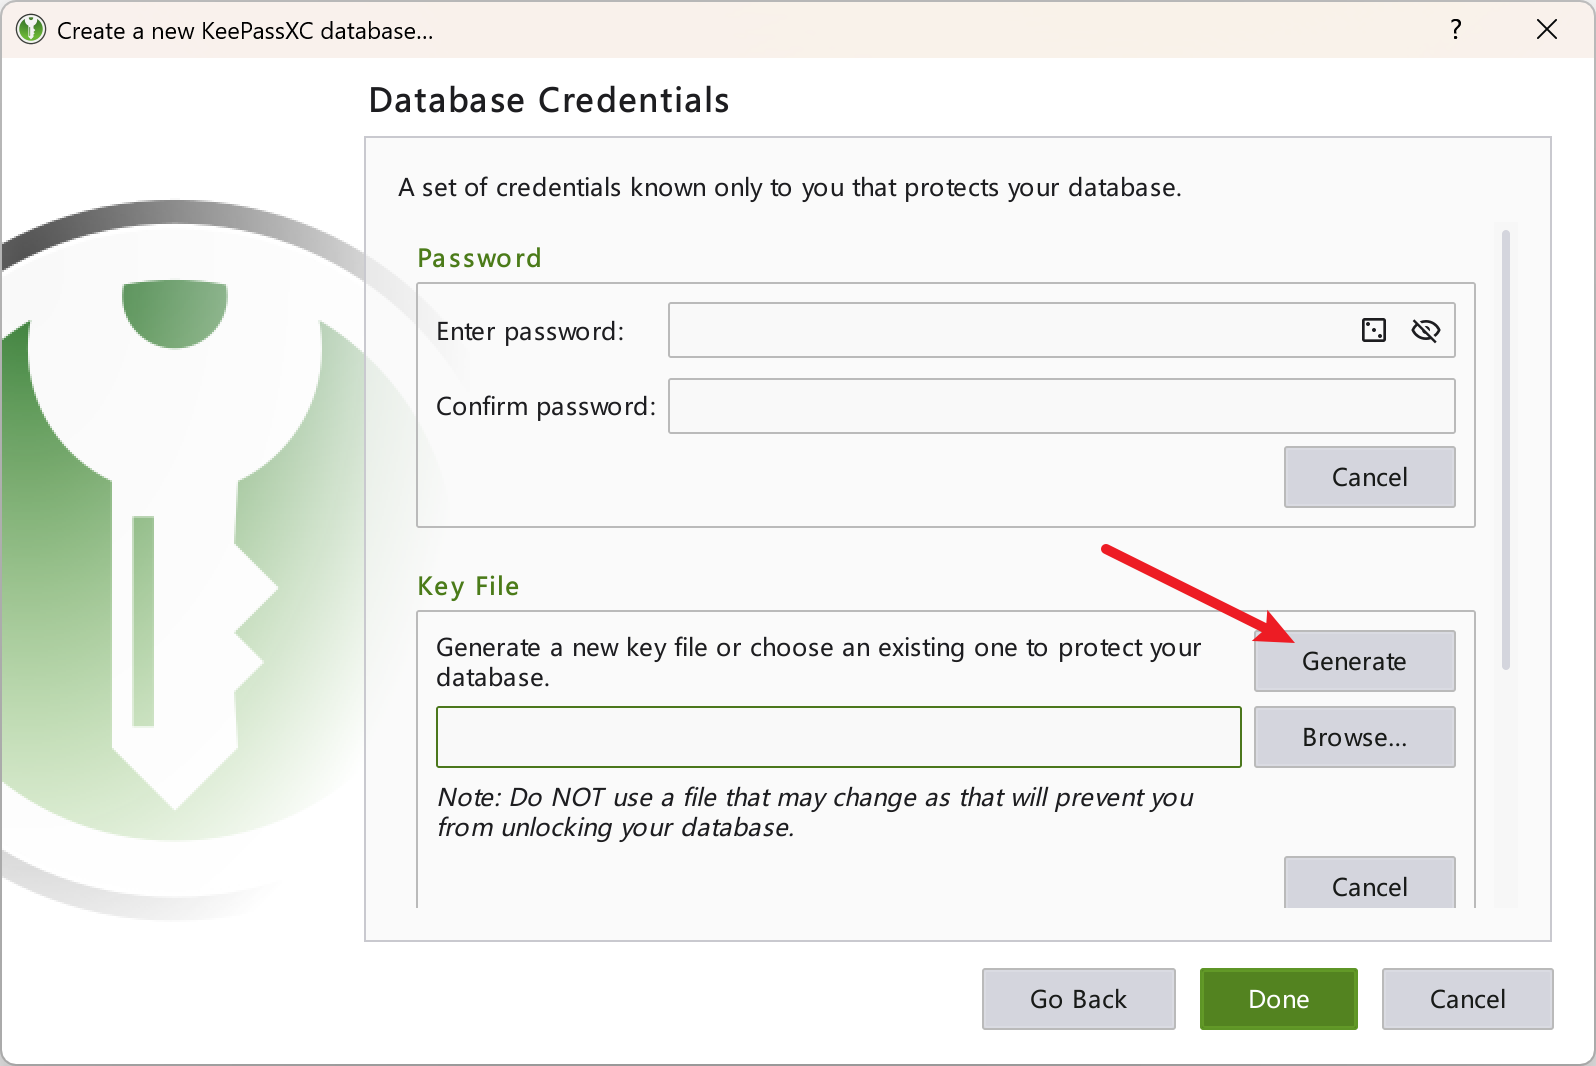
Of course, for greater security, you can use both a password and a key file to encrypt the database. In this case, losing either one will make your database permanently inaccessible. So, regardless of the method, I recommend making backups — never put all your eggs in one basket.
After setting the password or key file, click Finish button. A dialog will pop up to choose the save location for the database. It's recommended to save the database in a cloud sync folder like OneDrive. This way, after modifying and saving the database, it will automatically sync to the cloud. Even if the local database is lost, you can quickly restore it from the cloud.
Info
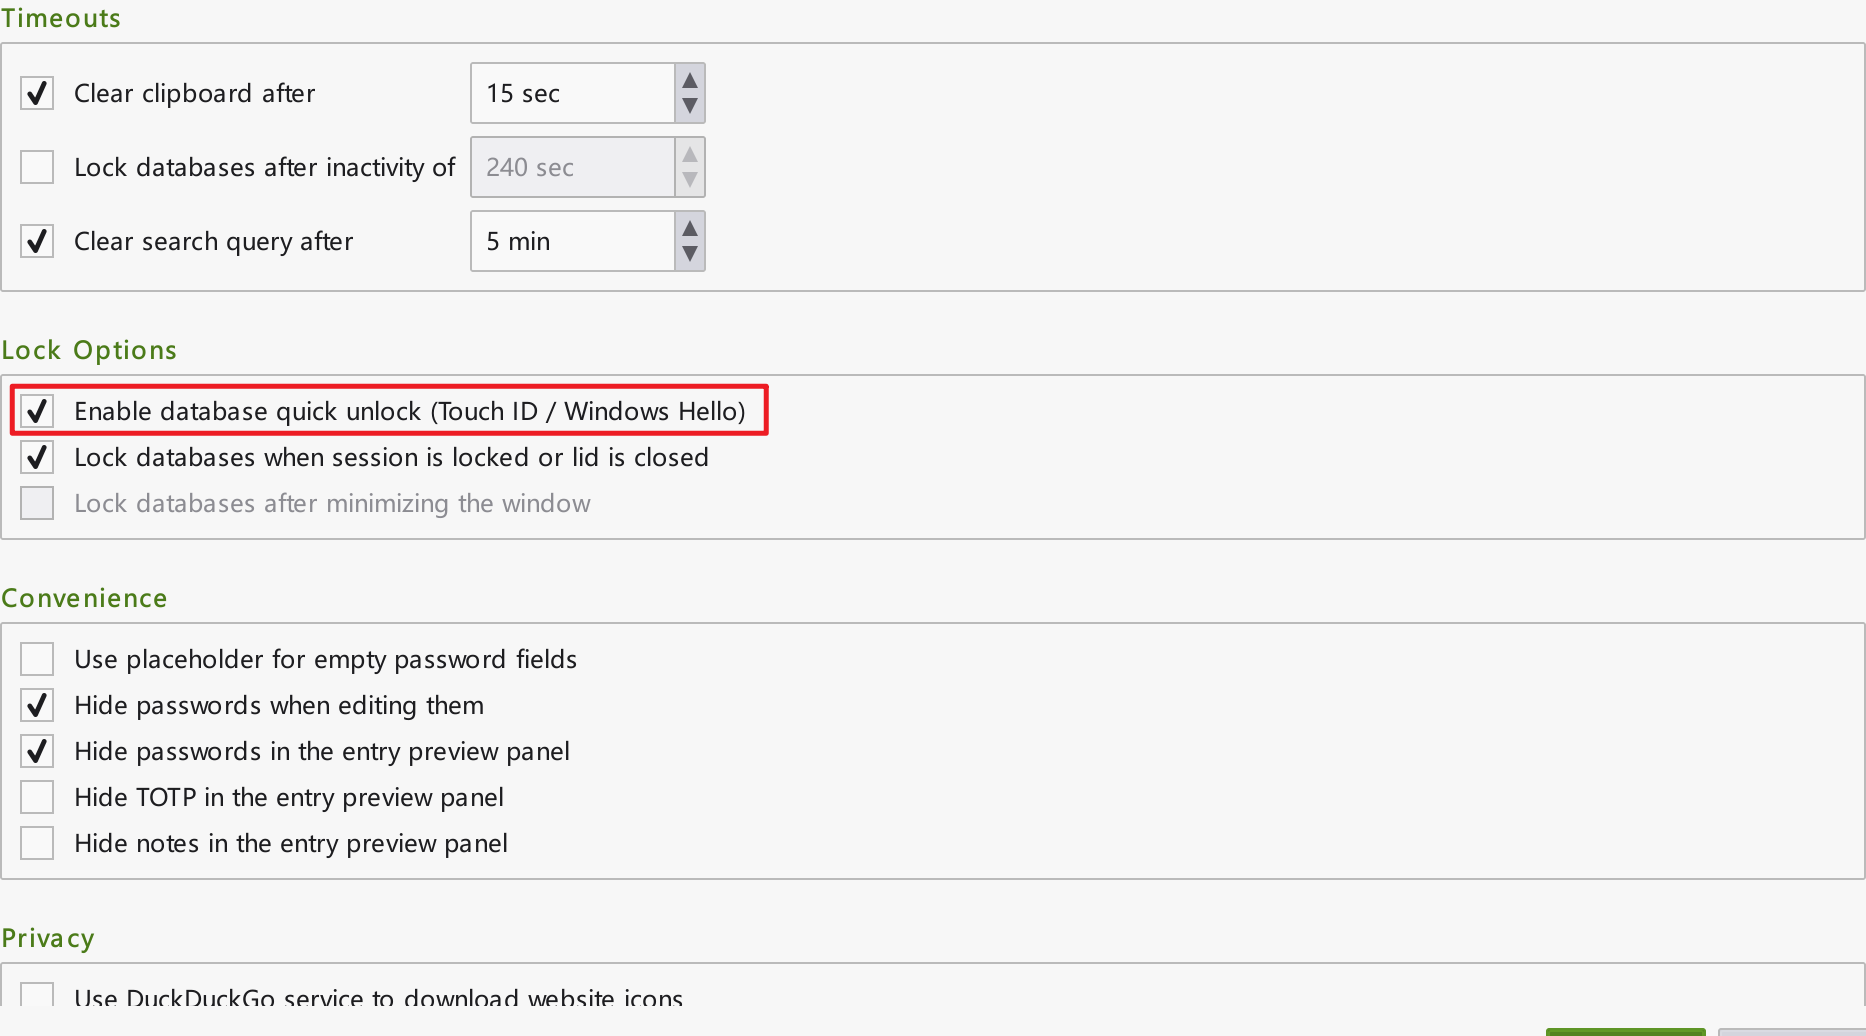
If your device supports Windows Hello, just use a password to encrypt the database and enable Quick Unlock in the settings. You can then quickly unlock the database using fingerprint or facial recognition. This is currently the most convenient and secure method, as long as your device supports it.
Create Groups
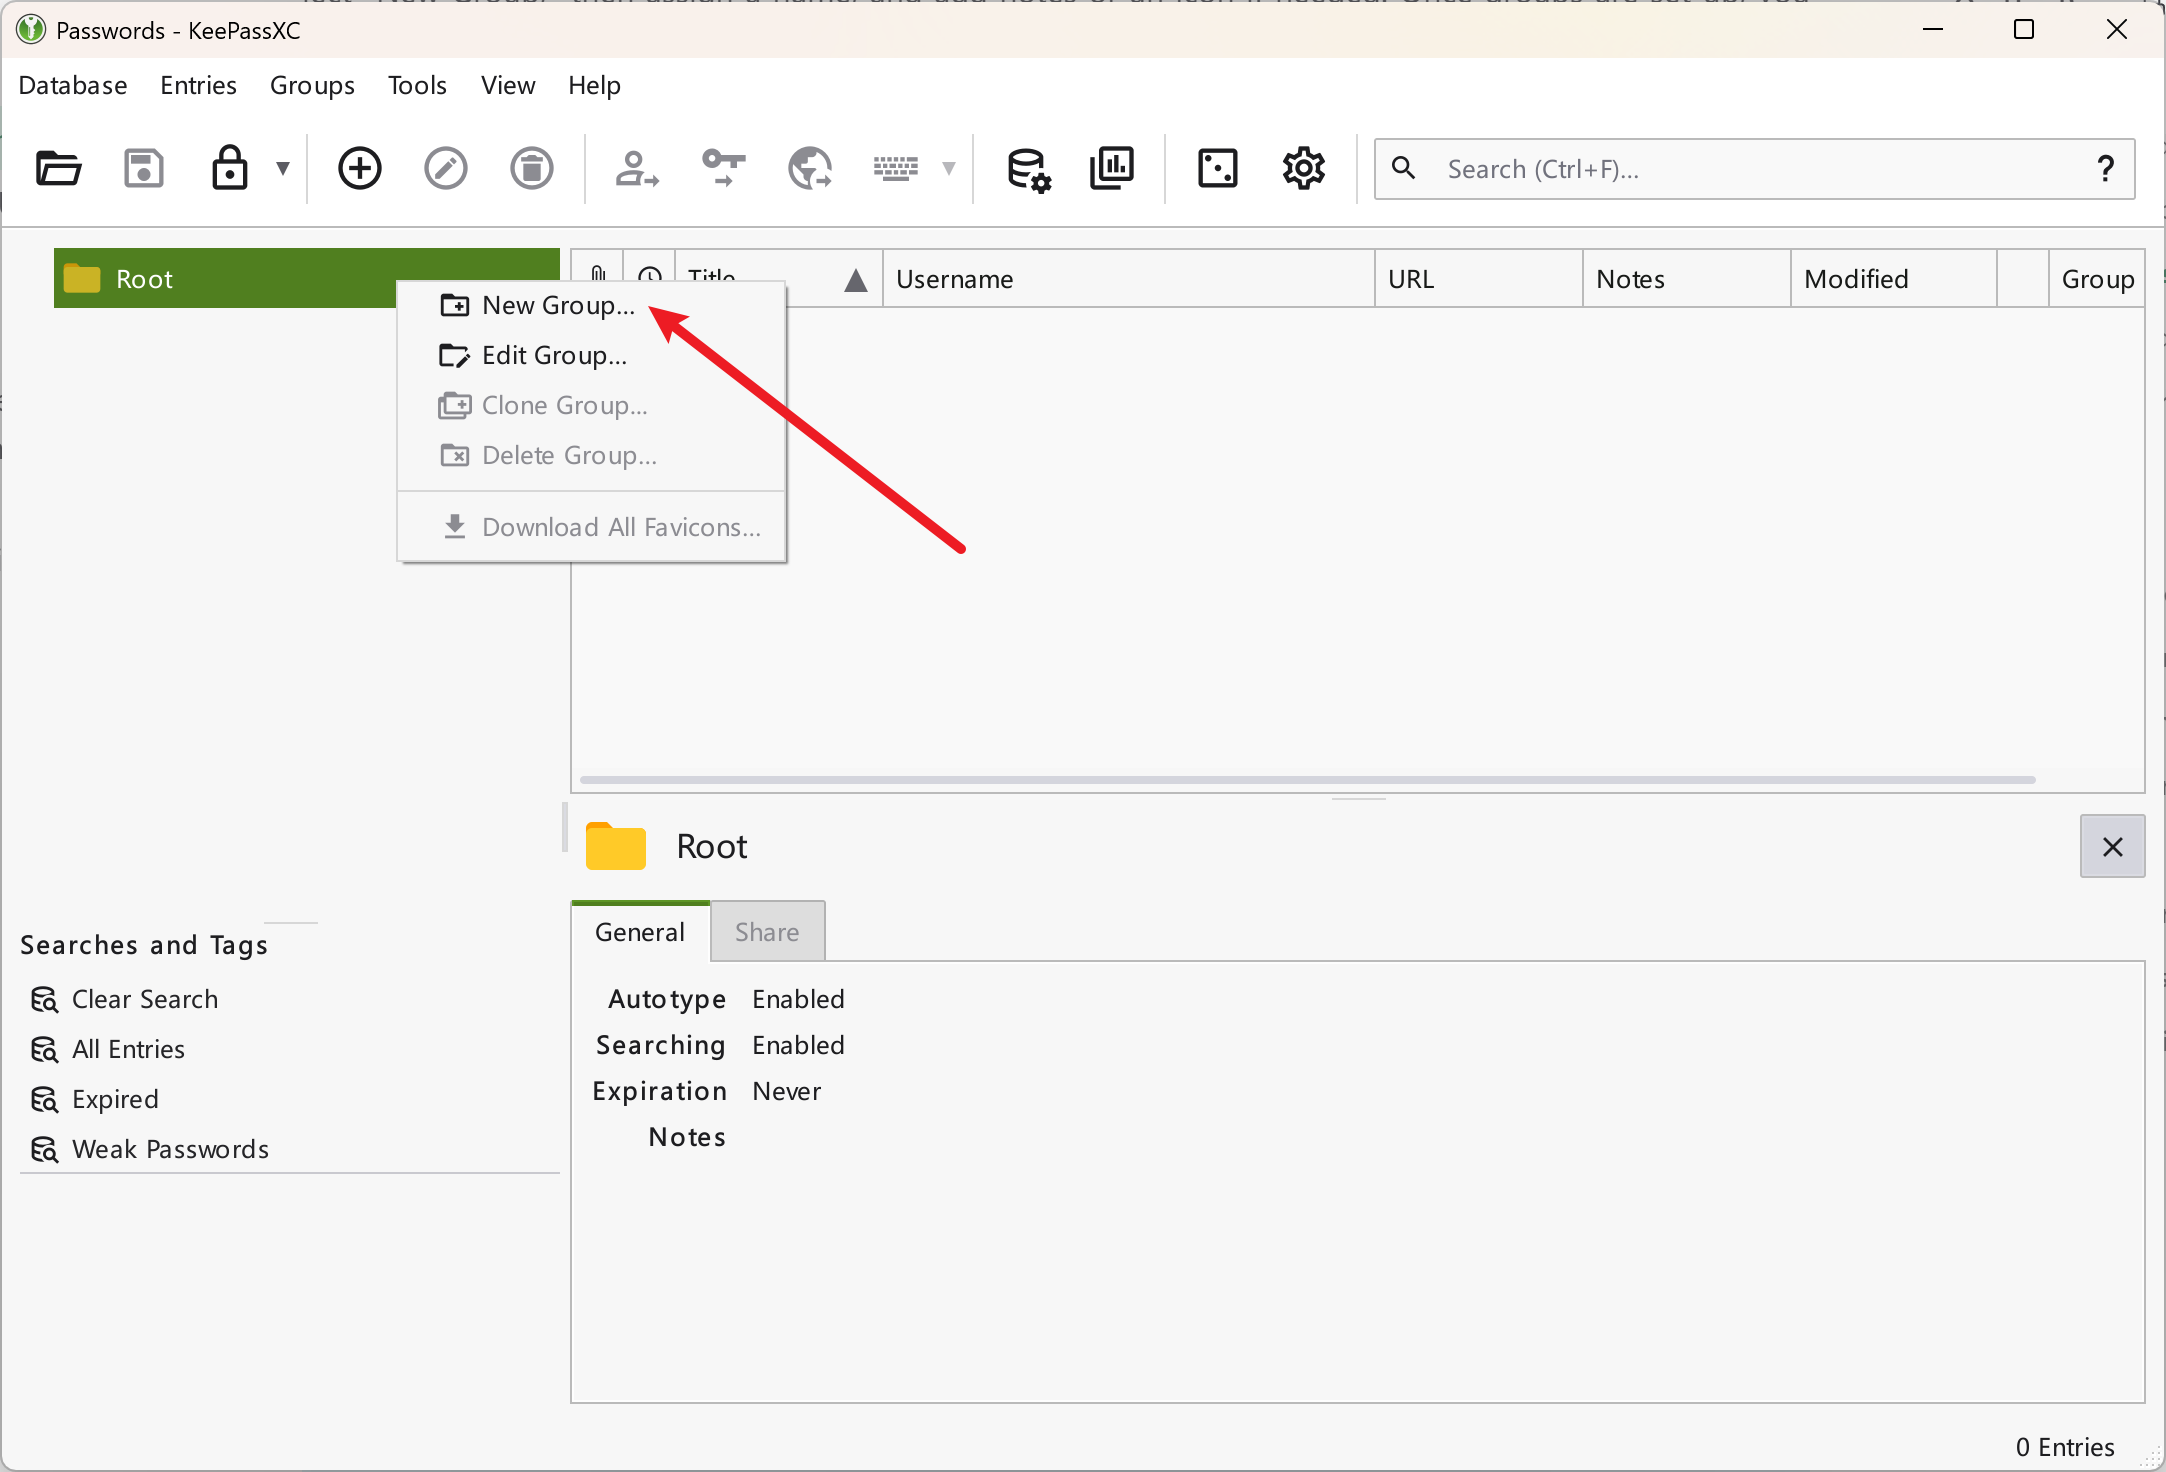
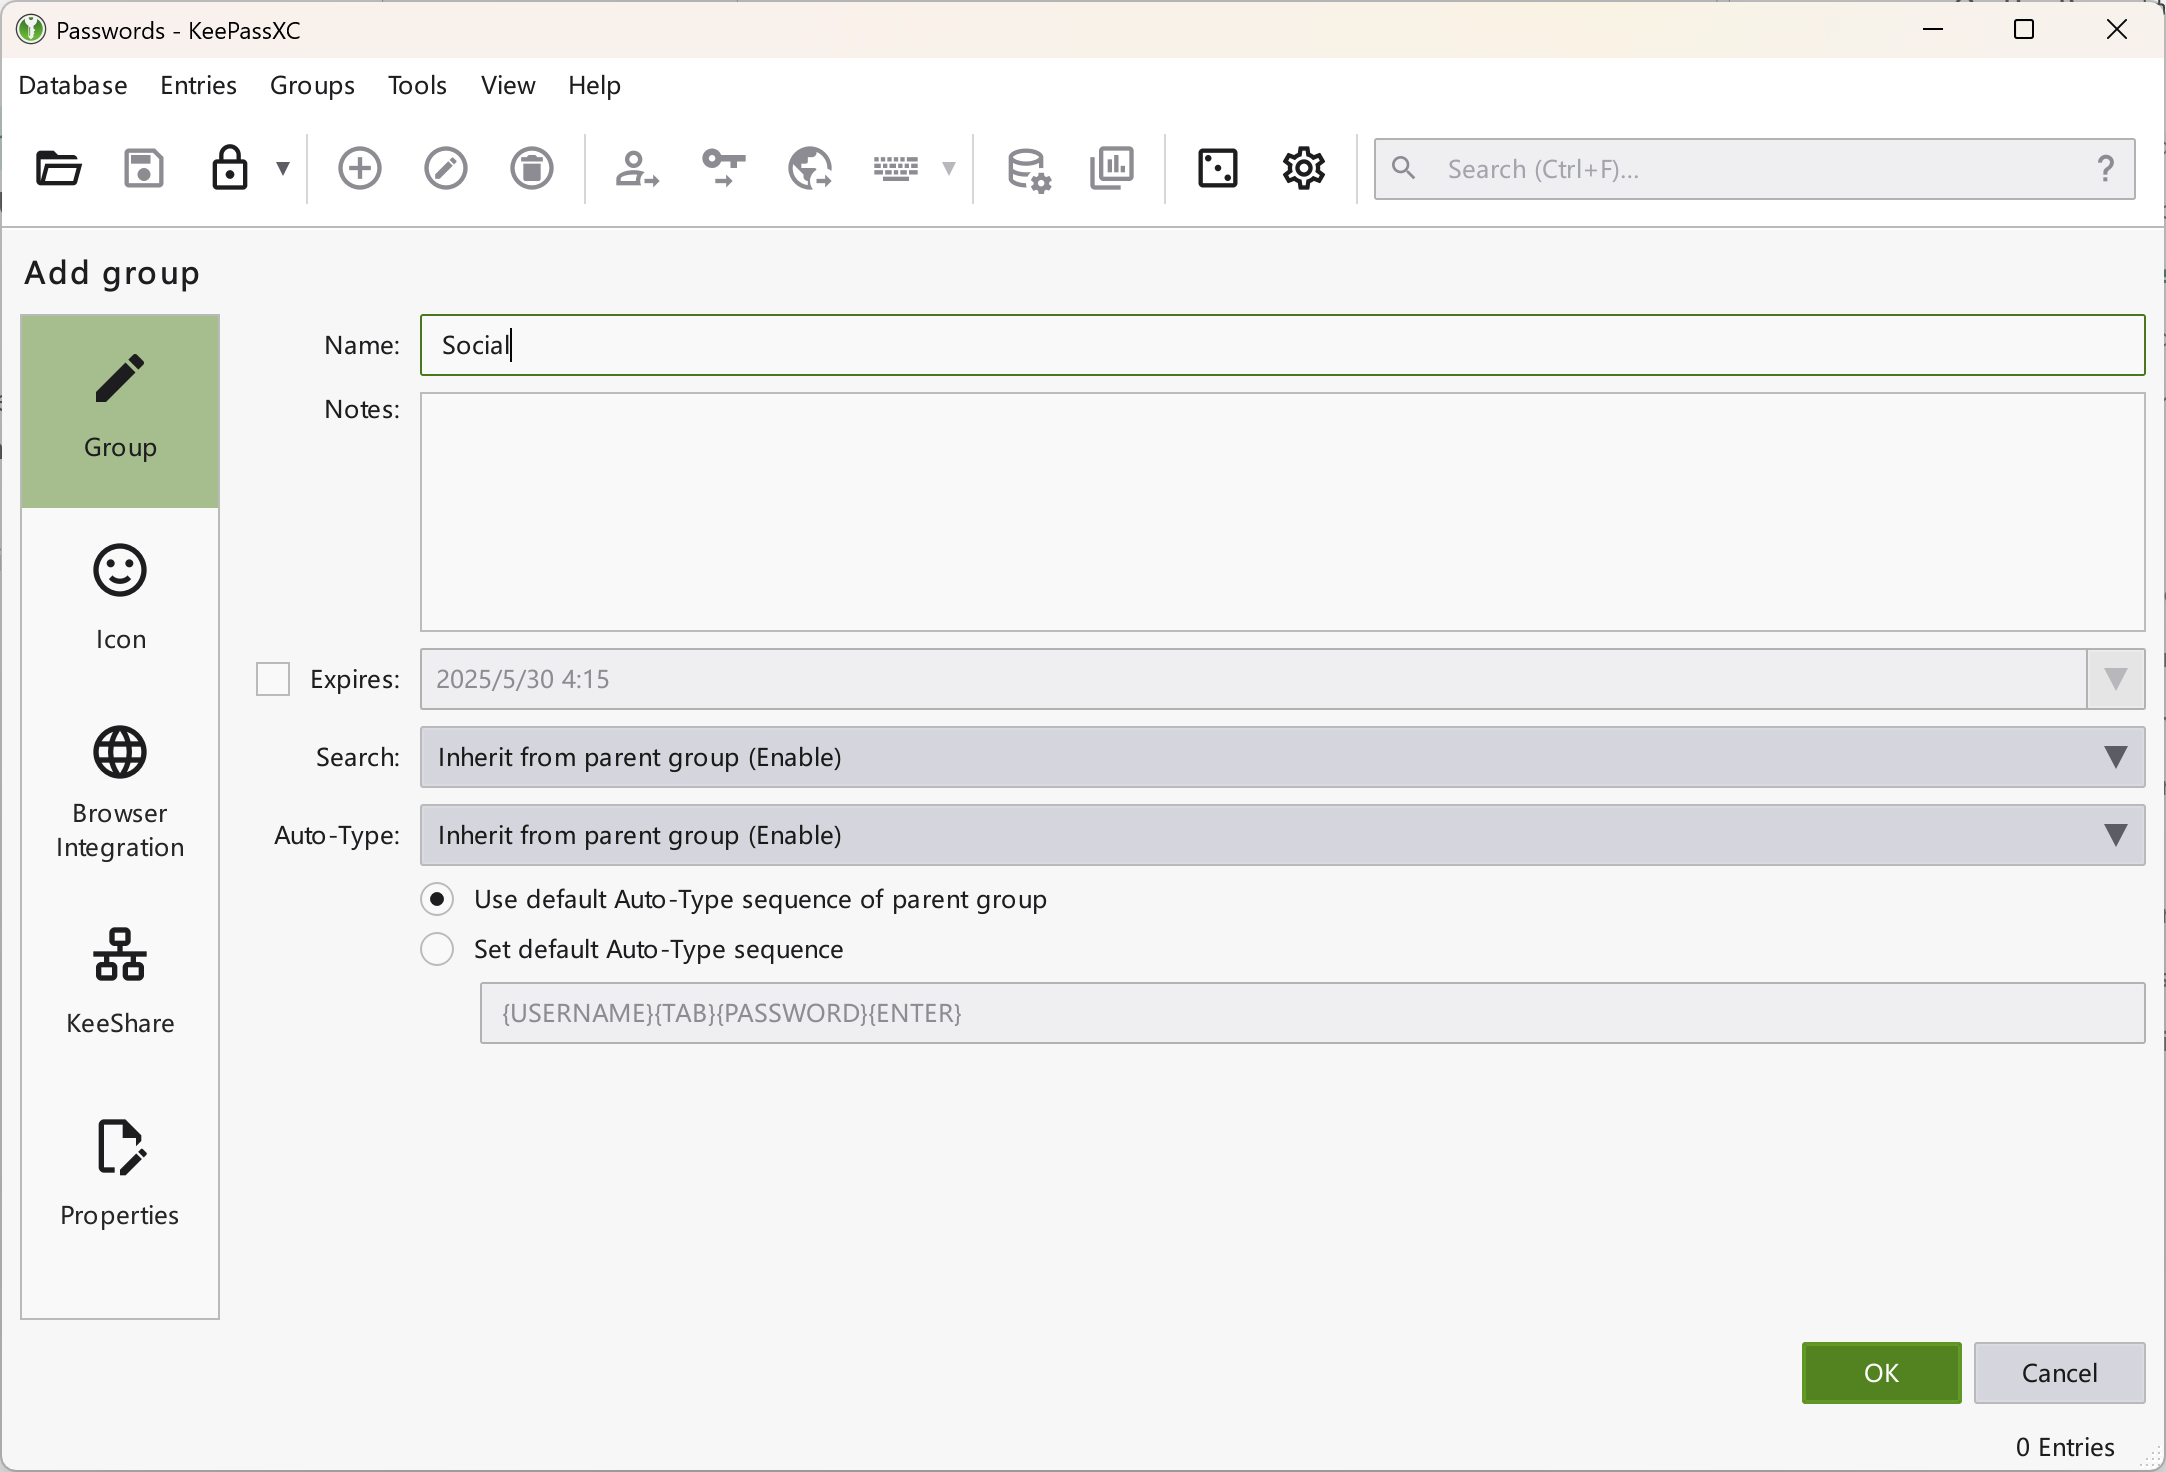
To keep your passwords organized, it's best to group them by purpose. Right-click the root group and select "New Group," then assign a name, and add notes or an icon if needed. Once groups are set up, you can categorize your passwords for easier management and retrieval.
Save Passwords
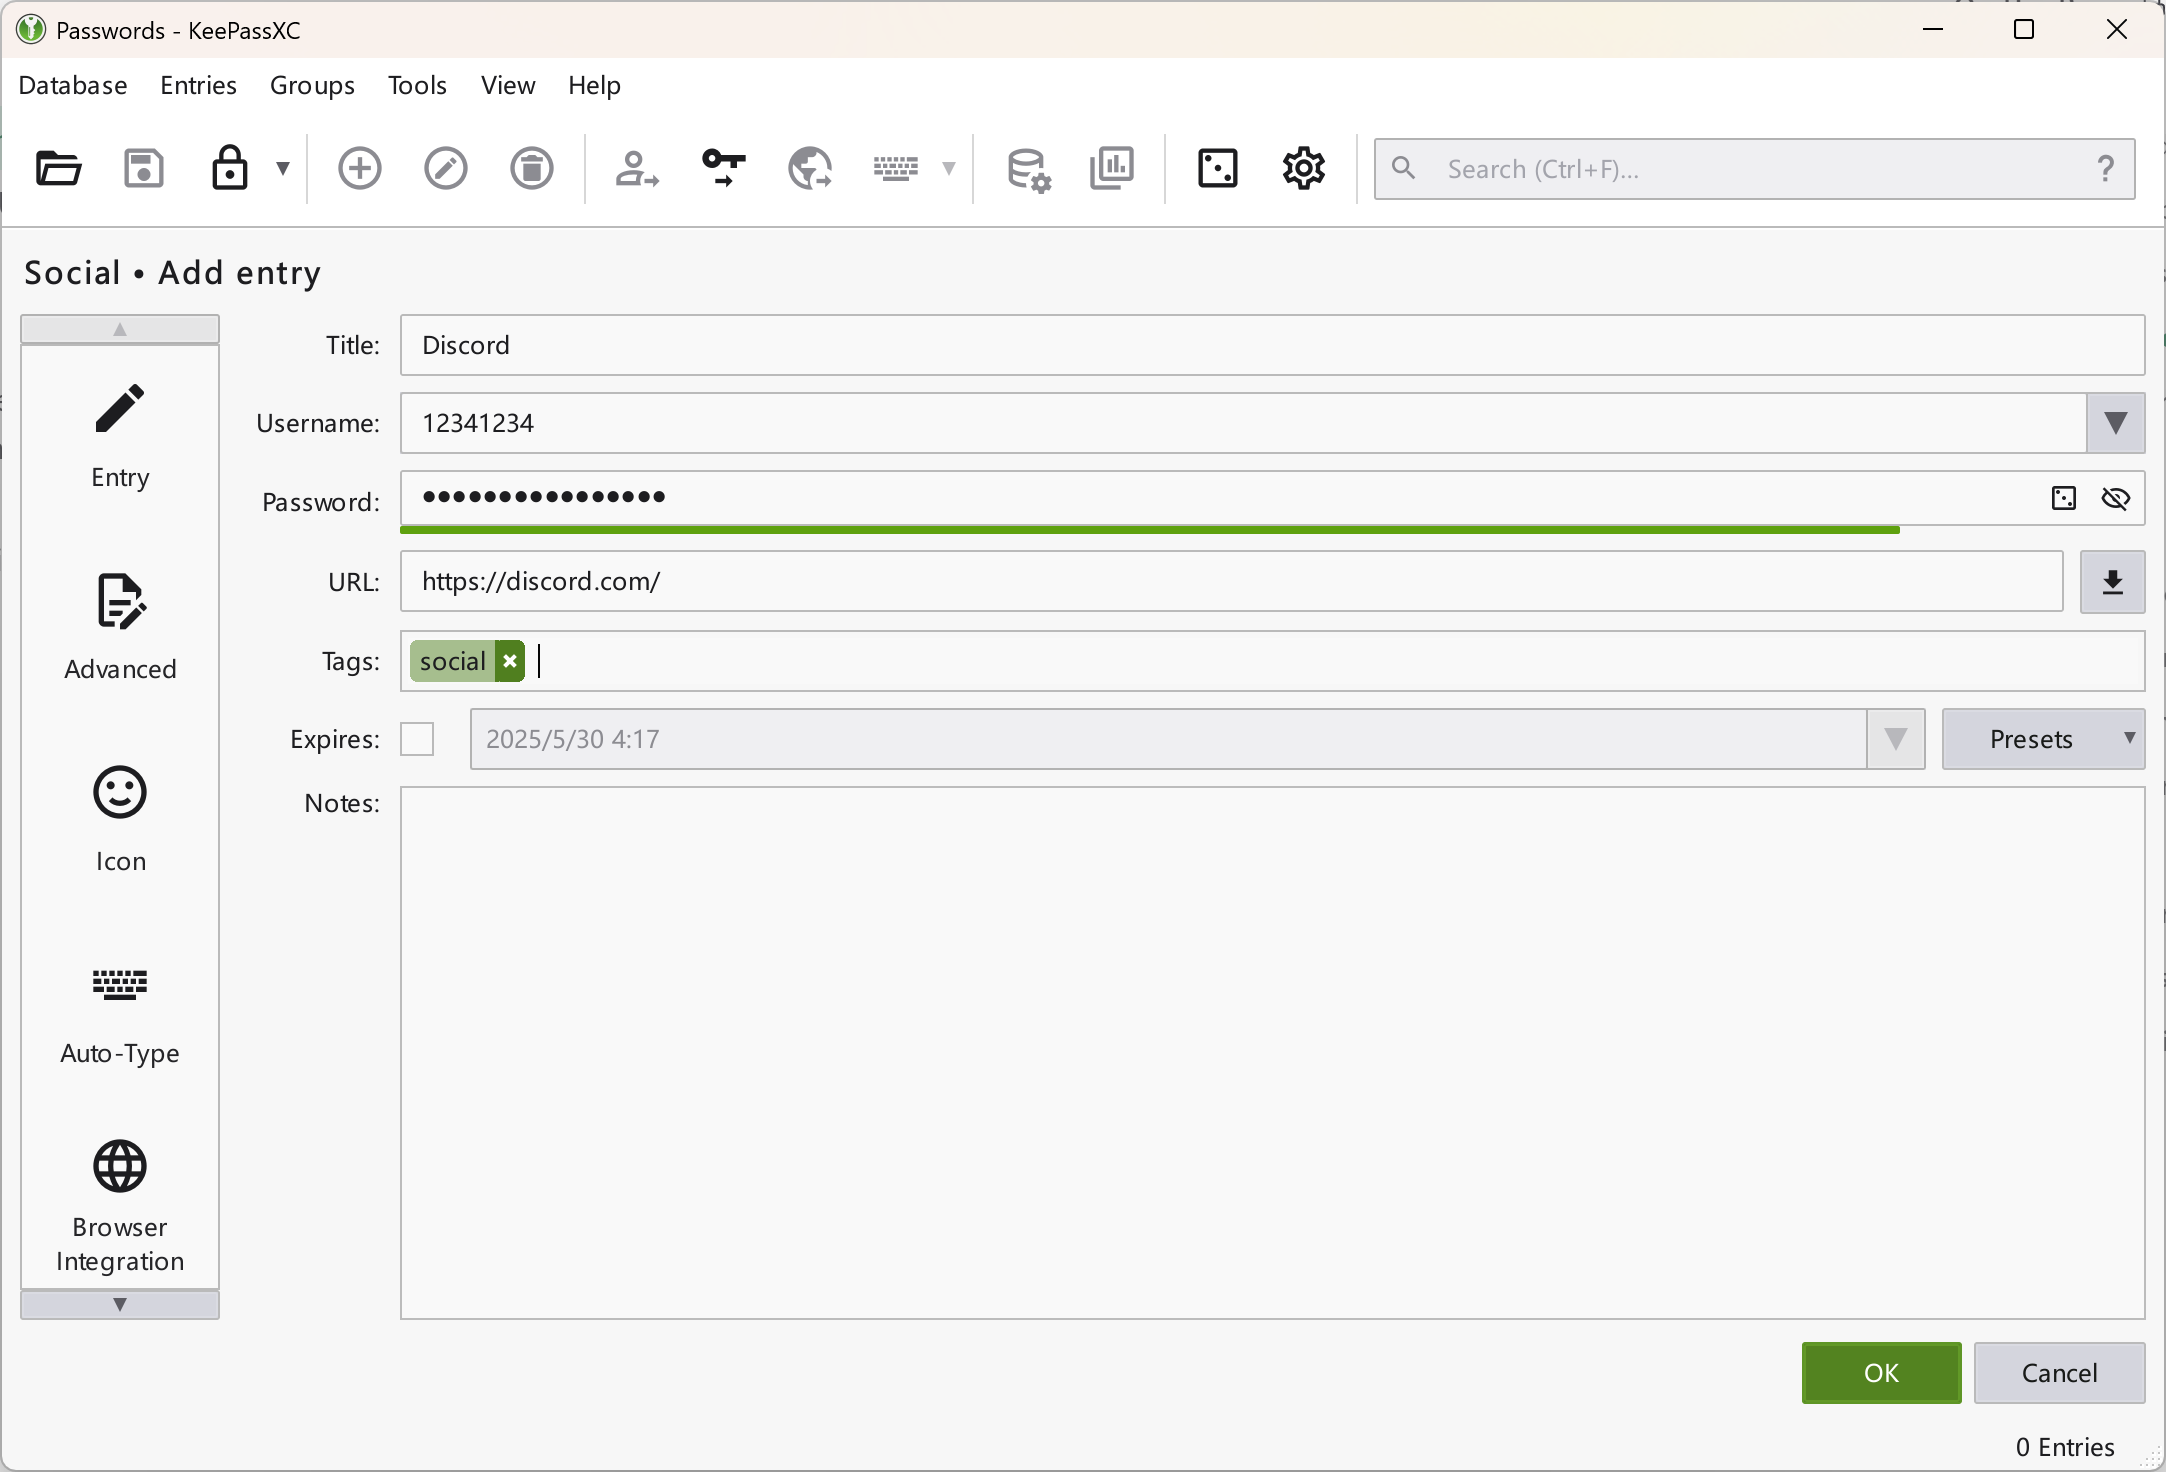
The primary function of KeePassXC is to save passwords. Select a group, then click Entry → New Entry in the menu bar or the Add New Entry button in the toolbar to open the add entry dialog.
Fill in the password details as follows:
Info
You can get a program's title by checking the window title or viewing it in Task Manager.
- Title: The name of the password entry. For auto-type, the title must match the target program's window title.
- Username: The username to save. If the database already has the same username, it can auto-complete.
- Password: The password to save. Click the square button next to the password field to launch the password generator. The line below shows password strength with colors.
- URL: The website address for the account. Click the download button to fetch the site's favicon as the entry's icon.
- Tags: Add tags to the entry (English only).
- Expiry Date: Set a password expiry date if needed. Usually not required unless you have higher security needs.
- Notes: Add any additional notes if necessary.
Using Passwords
After saving passwords, how do you use them? It's simple: open KeePassXC, find the entry you need, right-click it, and select Copy Username or Copy Password to paste them where needed. You can also use keyboard shortcuts or toolbar icons (the third group of icons in the toolbar). The default shortcuts are Ctrl+B and Ctrl+C.
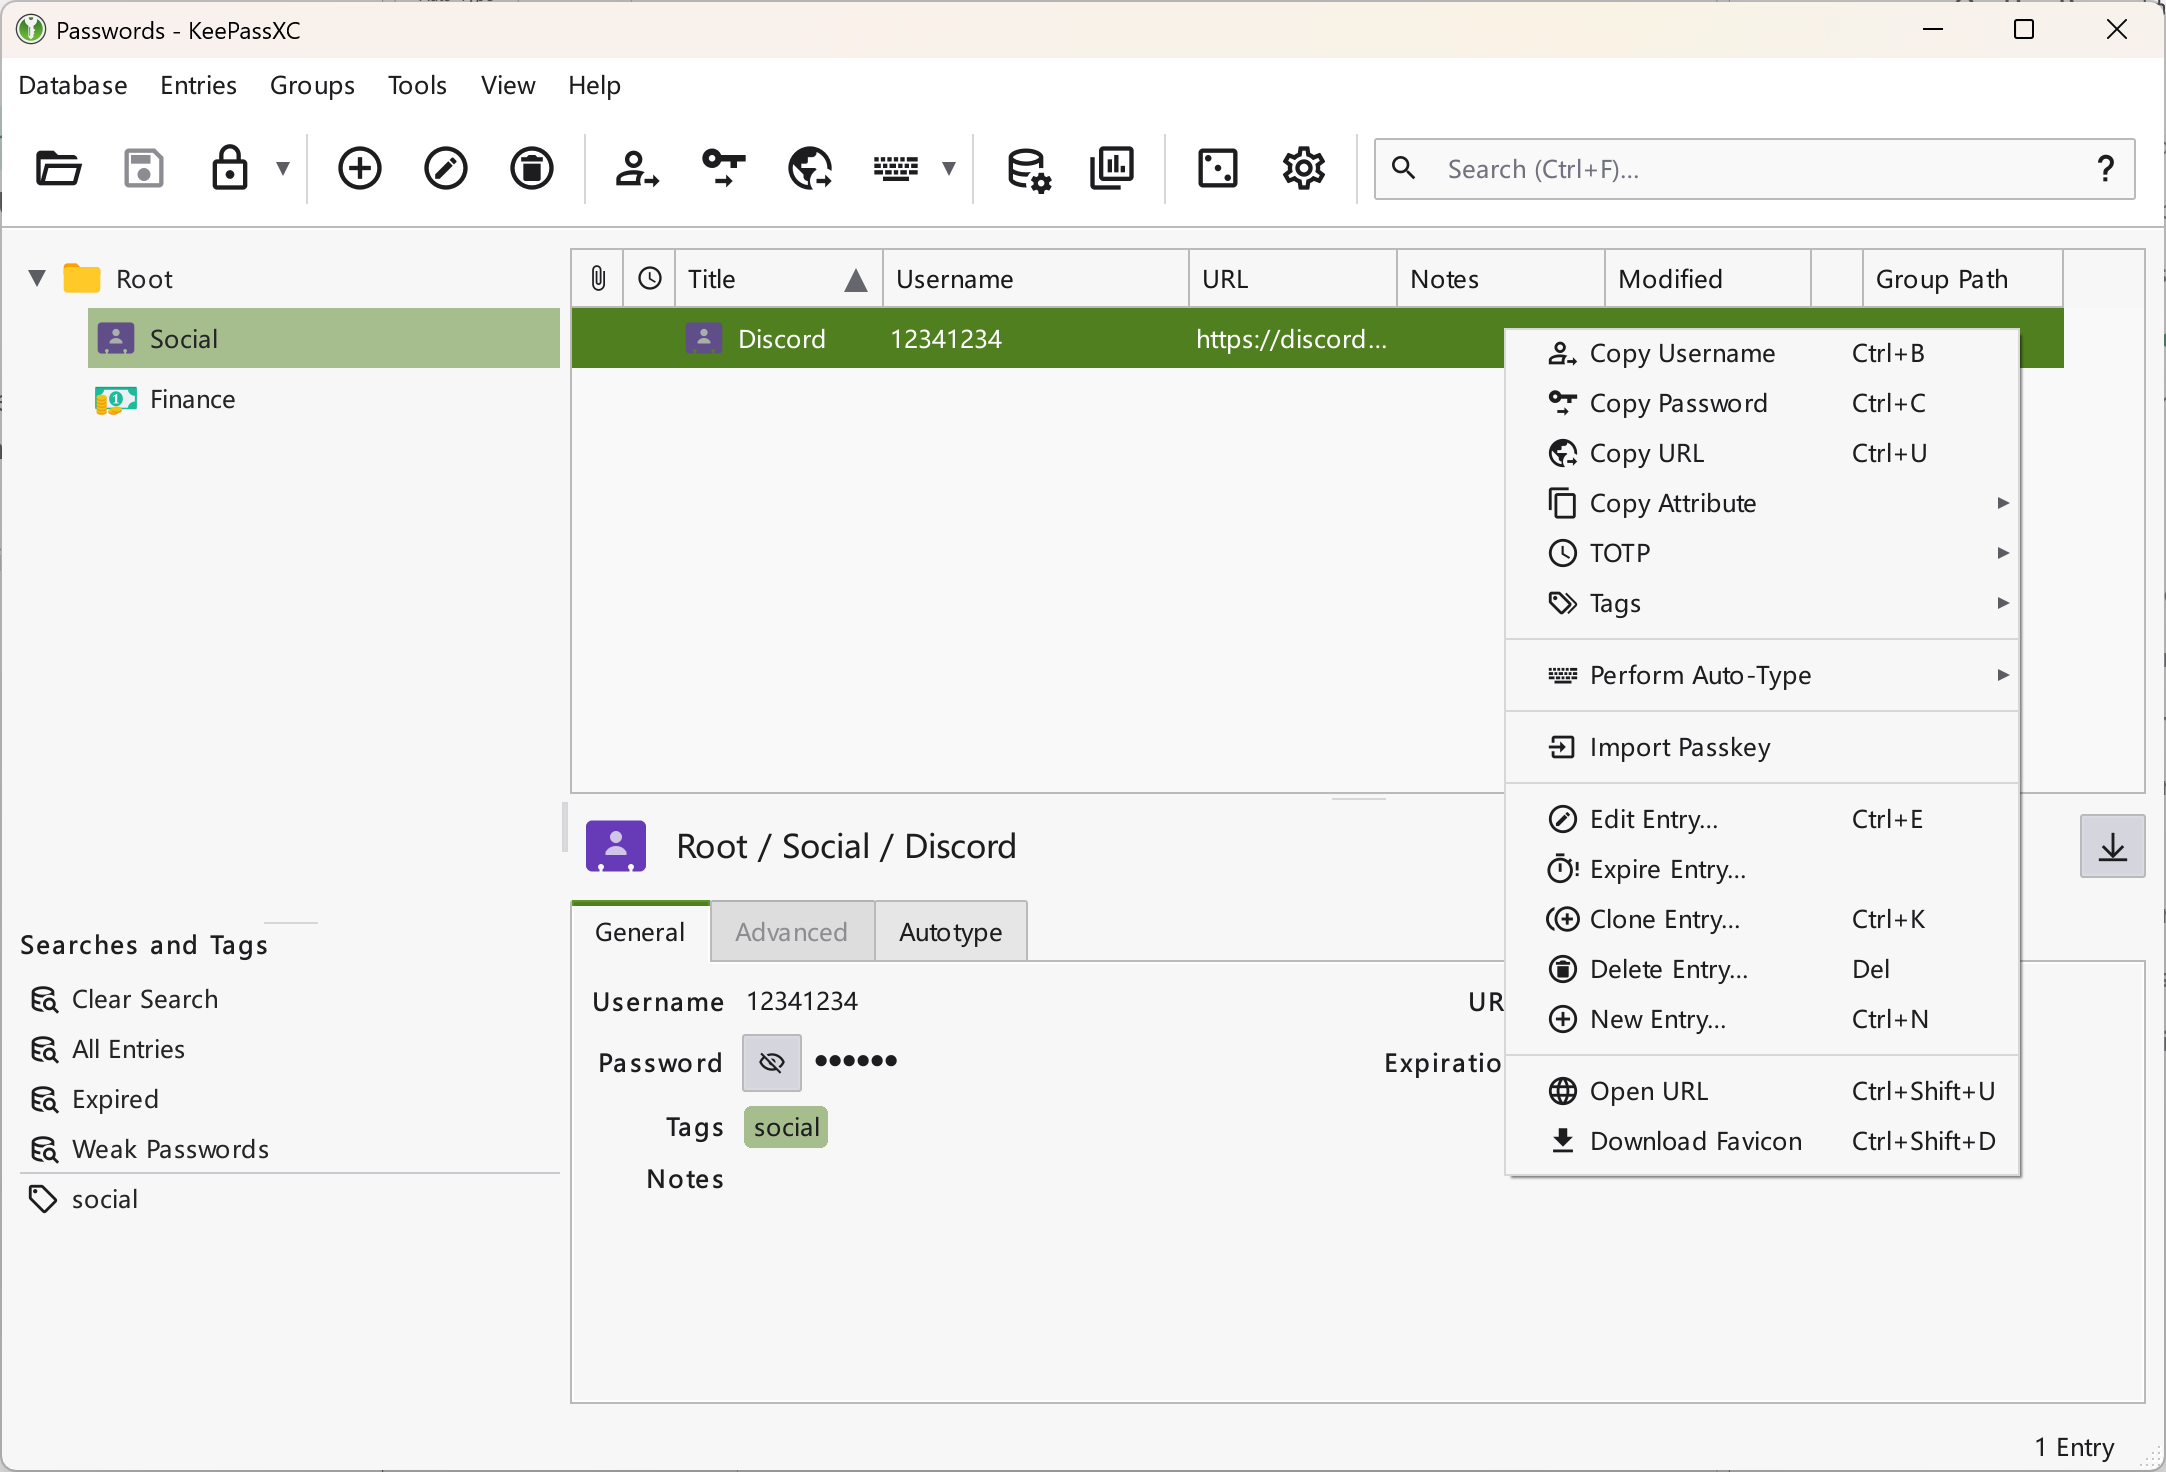
Many programs can access the clipboard. To prevent accidental password leaks from copying and pasting, KeePassXC uses a timeout mechanism. By default, the clipboard is cleared after 10 seconds to protect your passwords. You can see the countdown in the status bar at the bottom right.
Auto-Type
KeePassXC also has a powerful auto-type feature for automatically filling in usernames and passwords.
First, open the settings via Tools → Settings or the gear icon in the toolbar. Go to General → Auto-Type, assign a global auto-type shortcut (e.g., Ctrl+Alt+A), and click Save. By default, a dialog will pop up before each auto-type. You can uncheck Always ask before performing auto-type in settings so that if only one matching entry exists, auto-type will start immediately. If there are multiple matches, the dialog will appear.
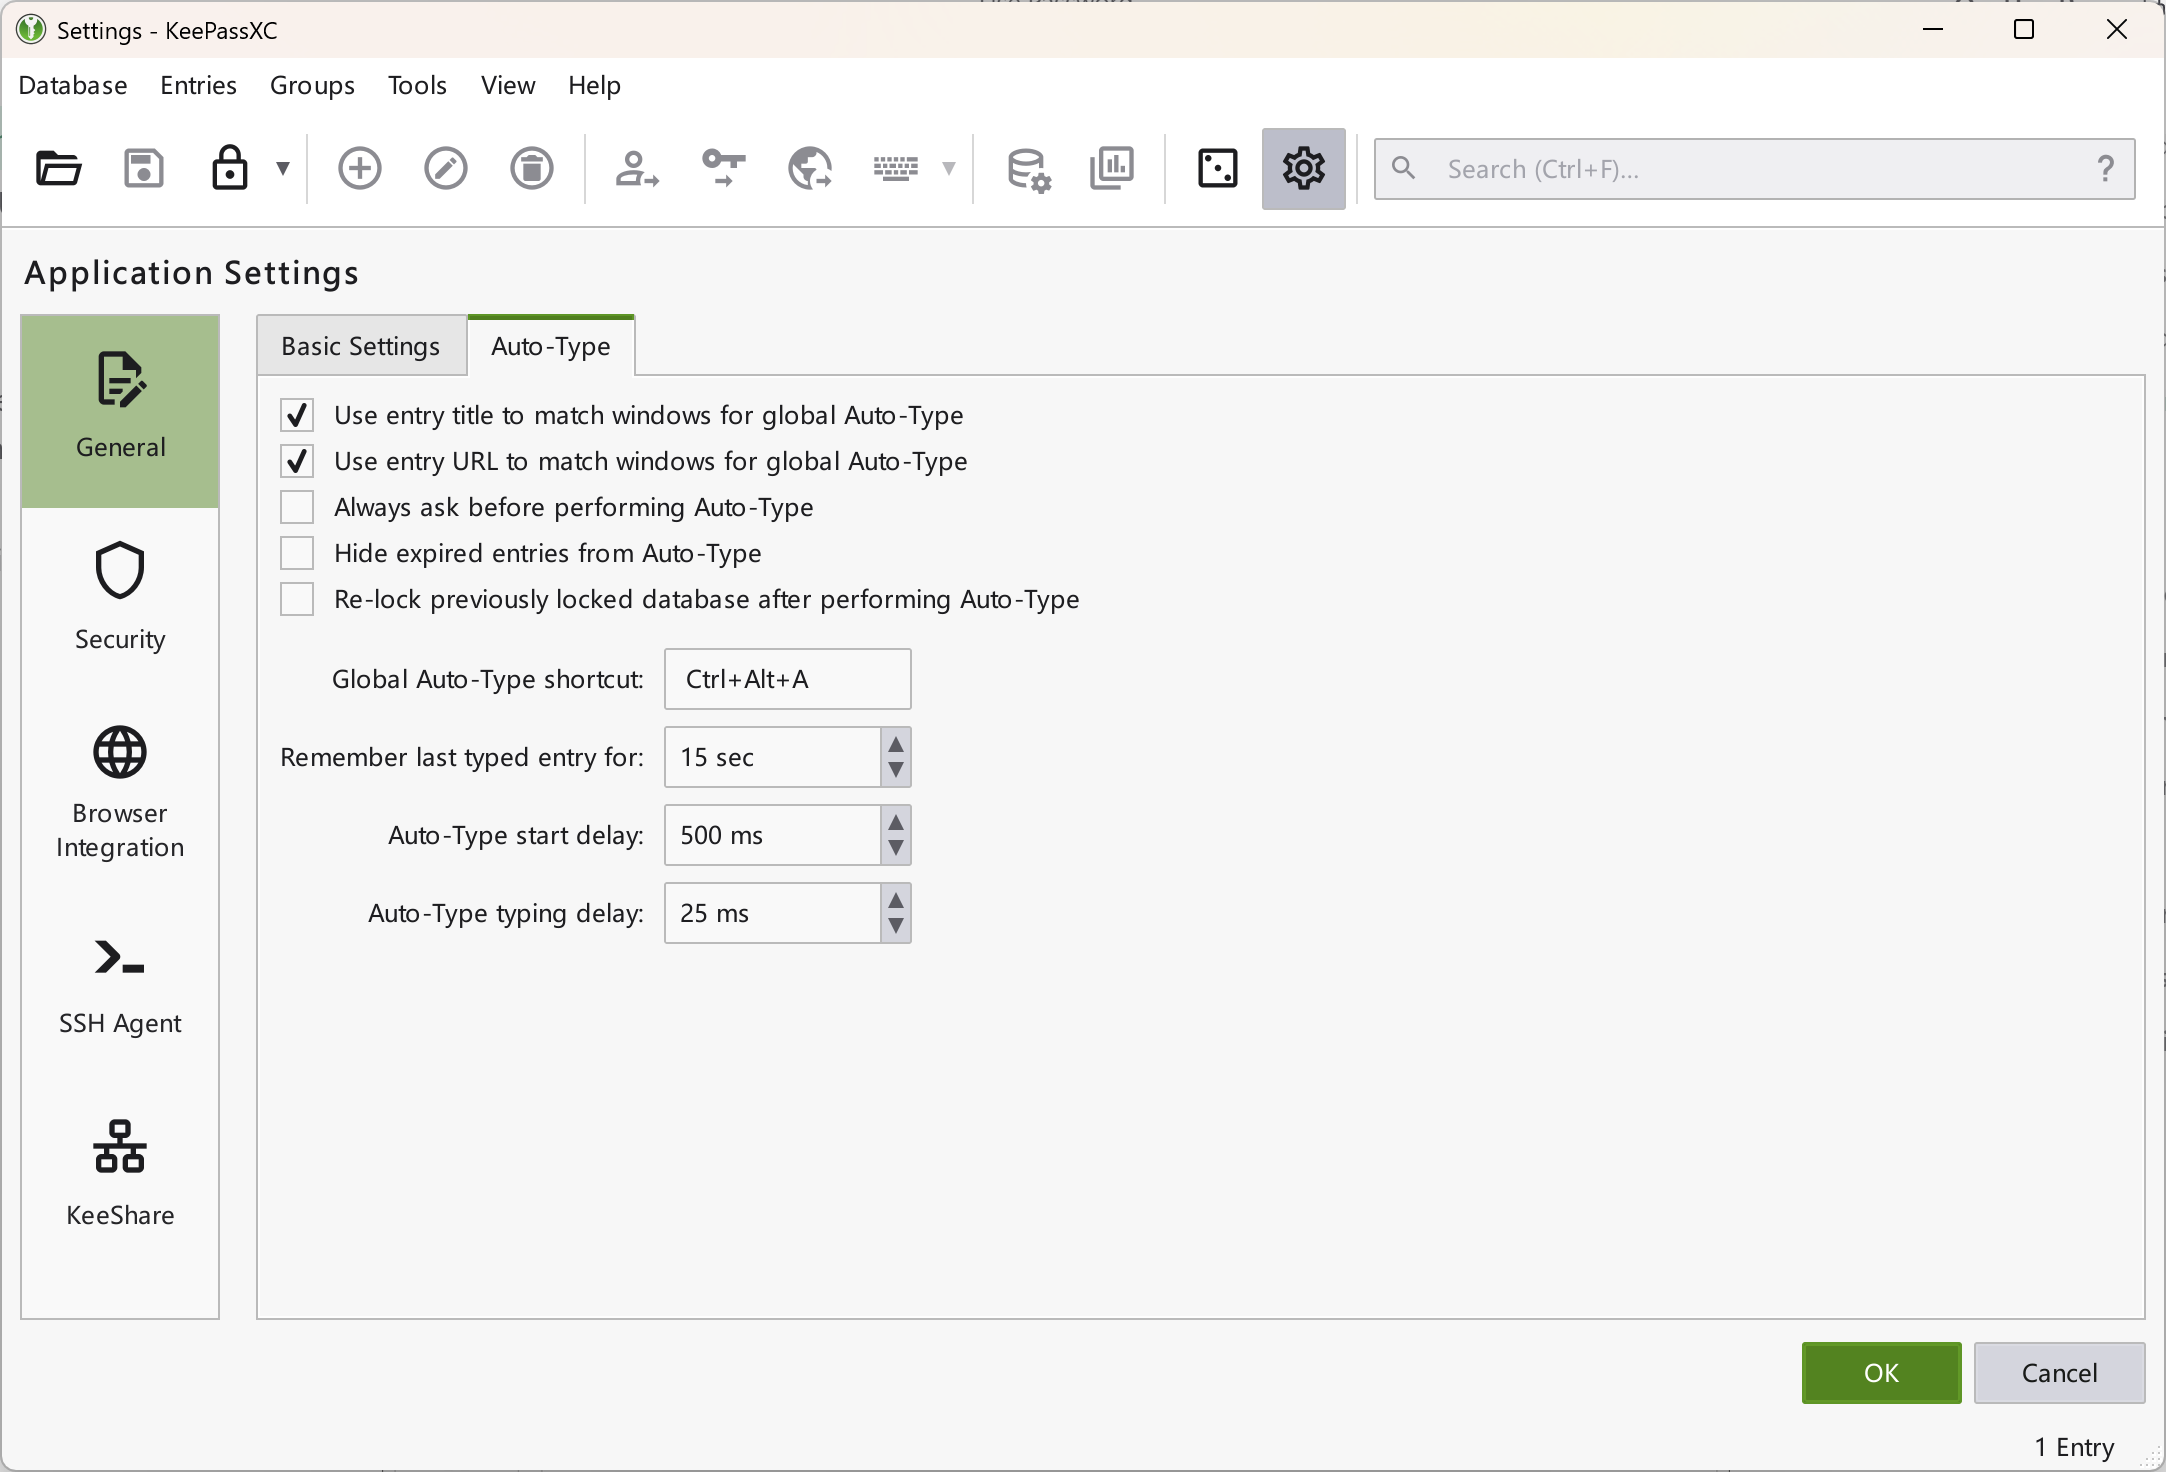
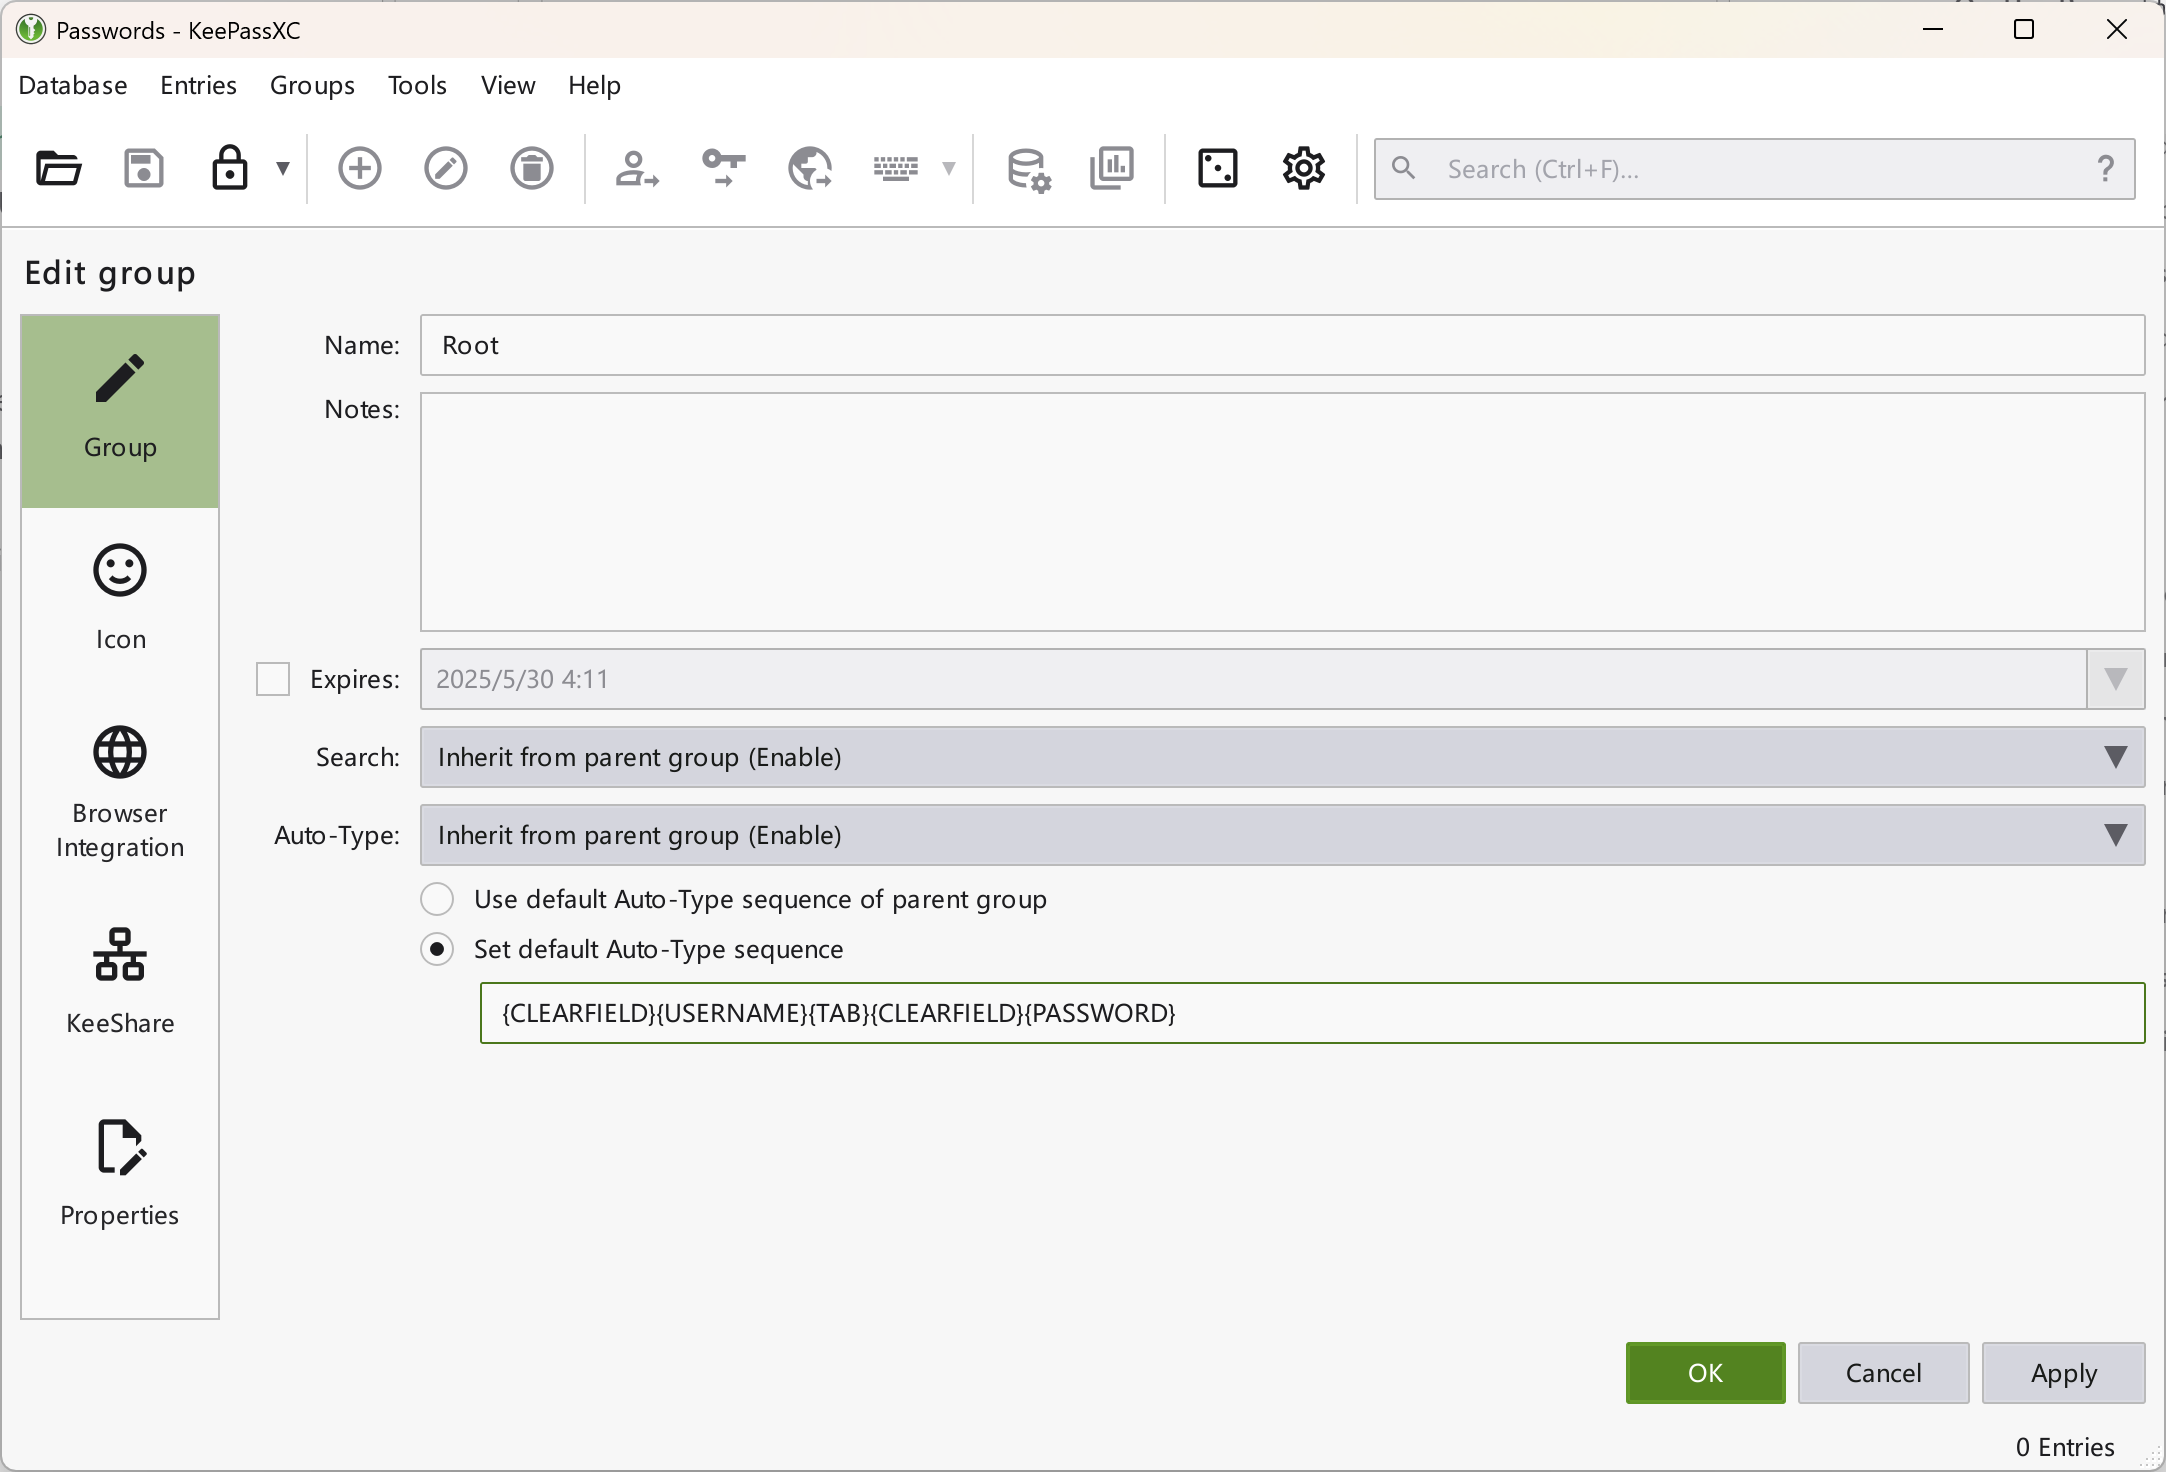
You can also modify the auto-type sequence in two ways: in the entry editor for individual entries, or by right-clicking a group and selecting Edit Group to apply a sequence to all entries in that group. To change the sequence for all entries, edit the root group's settings. My sequence is {CLEARFIELD}{USERNAME}{TAB}{CLEARFIELD}{PASSWORD}, which clears the username and password fields before auto-typing. You can also add {ENTER} at the end to submit the form after auto-type.
If you don't want to change it, you can use the default sequence: {USERNAME}{TAB}{PASSWORD}{ENTER}. This means: enter the username, press TAB to switch to the password field, enter the password, and press Enter to confirm.
Info
You can view all auto-type codes in the official reference manual.
After everything is set up, it's time to witness the magic! In the target program, click the input field, then press the shortcut you set (e.g., Ctrl+Alt+A), and KeePassXC will elegantly auto-type your password!
Warning
Auto-type does not work in all programs (such as QQ); only those that support clipboard pasting can use auto-type.
Advanced Tips
Password Generator
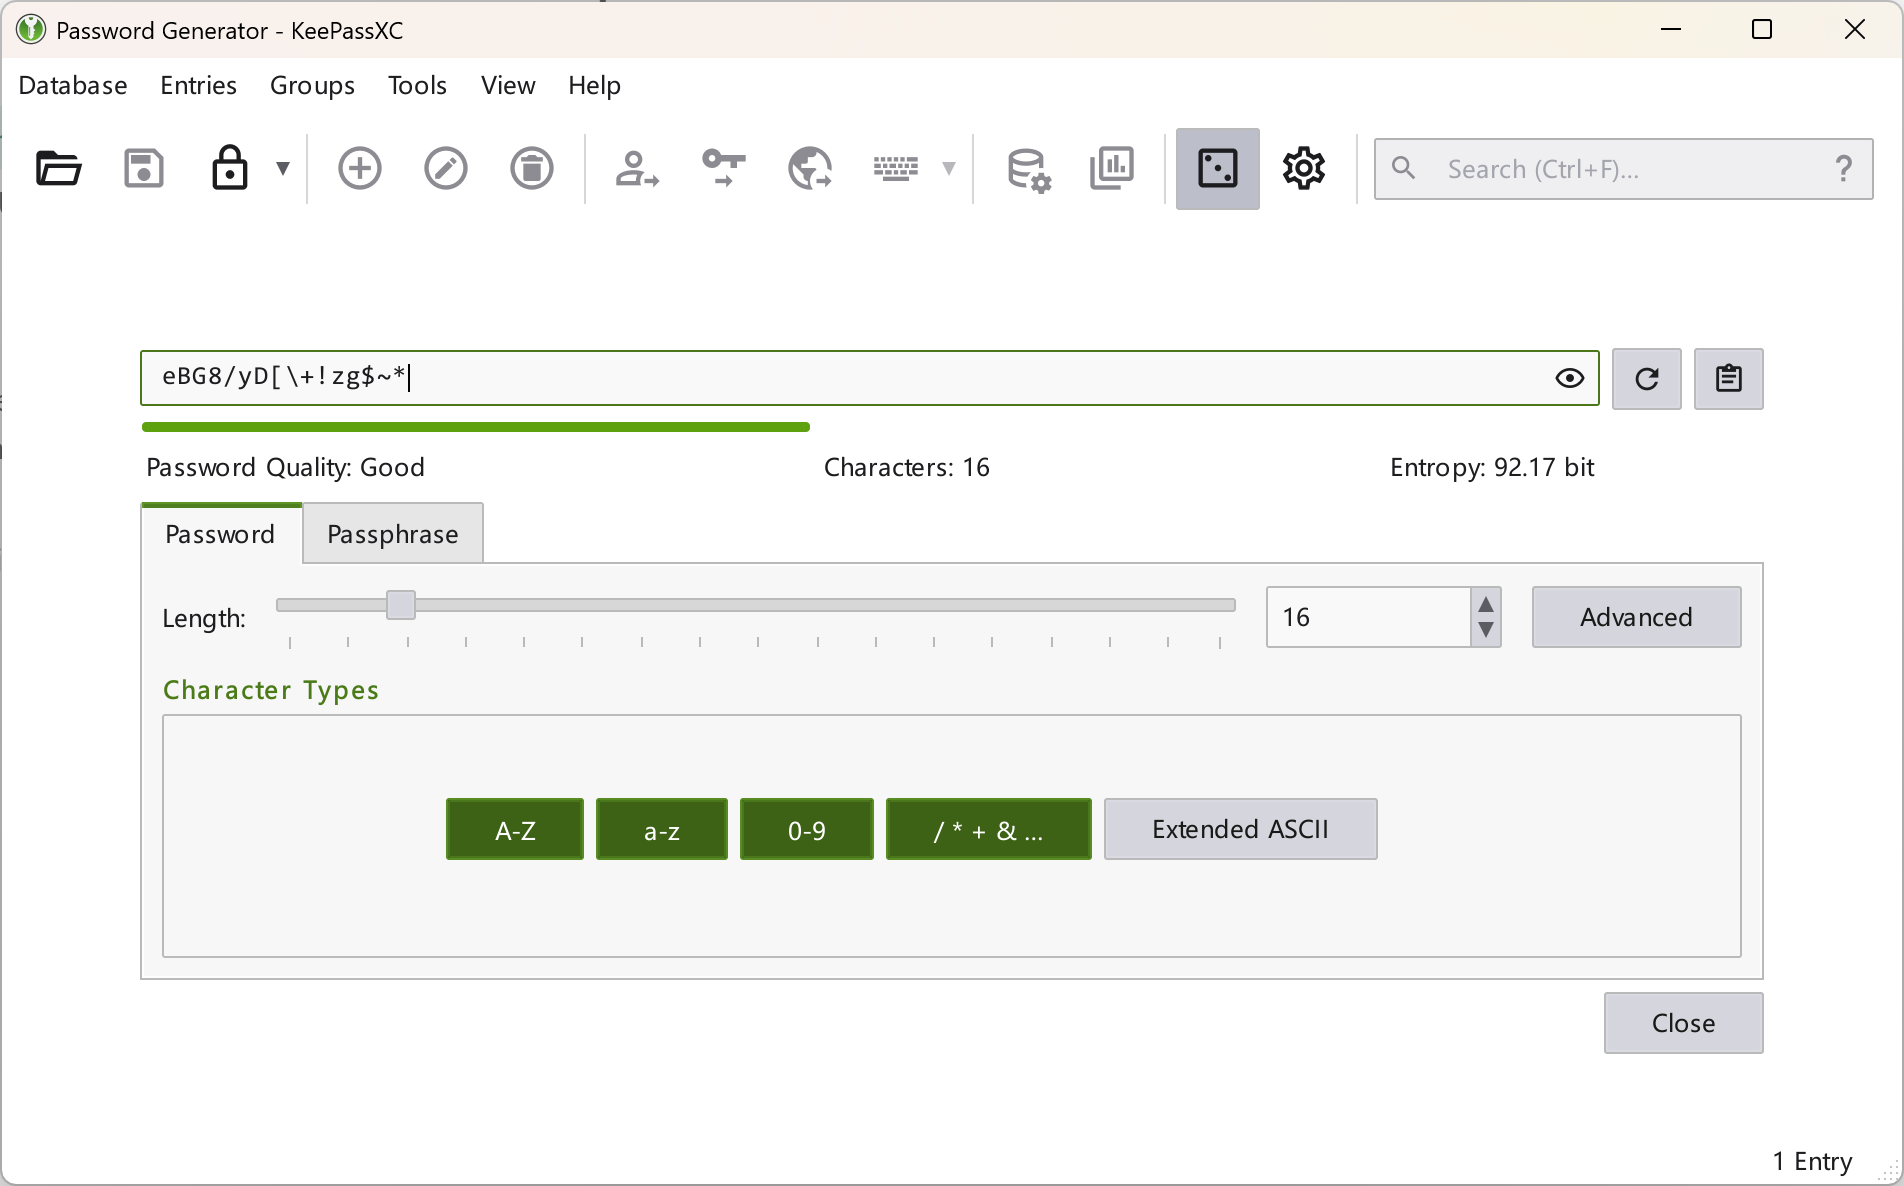
Click Tools → Password Generator in the menu or the fourth square icon in the toolbar to open the password generator. You can also open it from the password field when creating or editing an entry.
The password generator can create strong random passwords, which you can save in KeePassXC or copy elsewhere. The two buttons next to the password field are Regenerate Password and Copy to Clipboard. If you're not satisfied with the generated password, use controls below to change the length and character types.
Warning
The password generator does not save history. Once you close the window and reopen it, the generated password will change. If you need to copy the same password multiple times, save it as an entry first to avoid losing it.
Browser Integration
Browsers are also desktop applications, so KeePassXC can auto-fill in browsers as well. In this case, set the entry's title to the web page's title. You still need to add the entry in KeePassXC first.
What if you want to automatically save passwords entered in the browser to KeePassXC? KeePassXC provides browser integration for this.
First, install the browser extension from the Chrome Web Store or Edge Store.
Then, open the settings via the gear icon in the toolbar, enable Browser Integration, and check the browsers you want to integrate under Enable integration for these browsers.
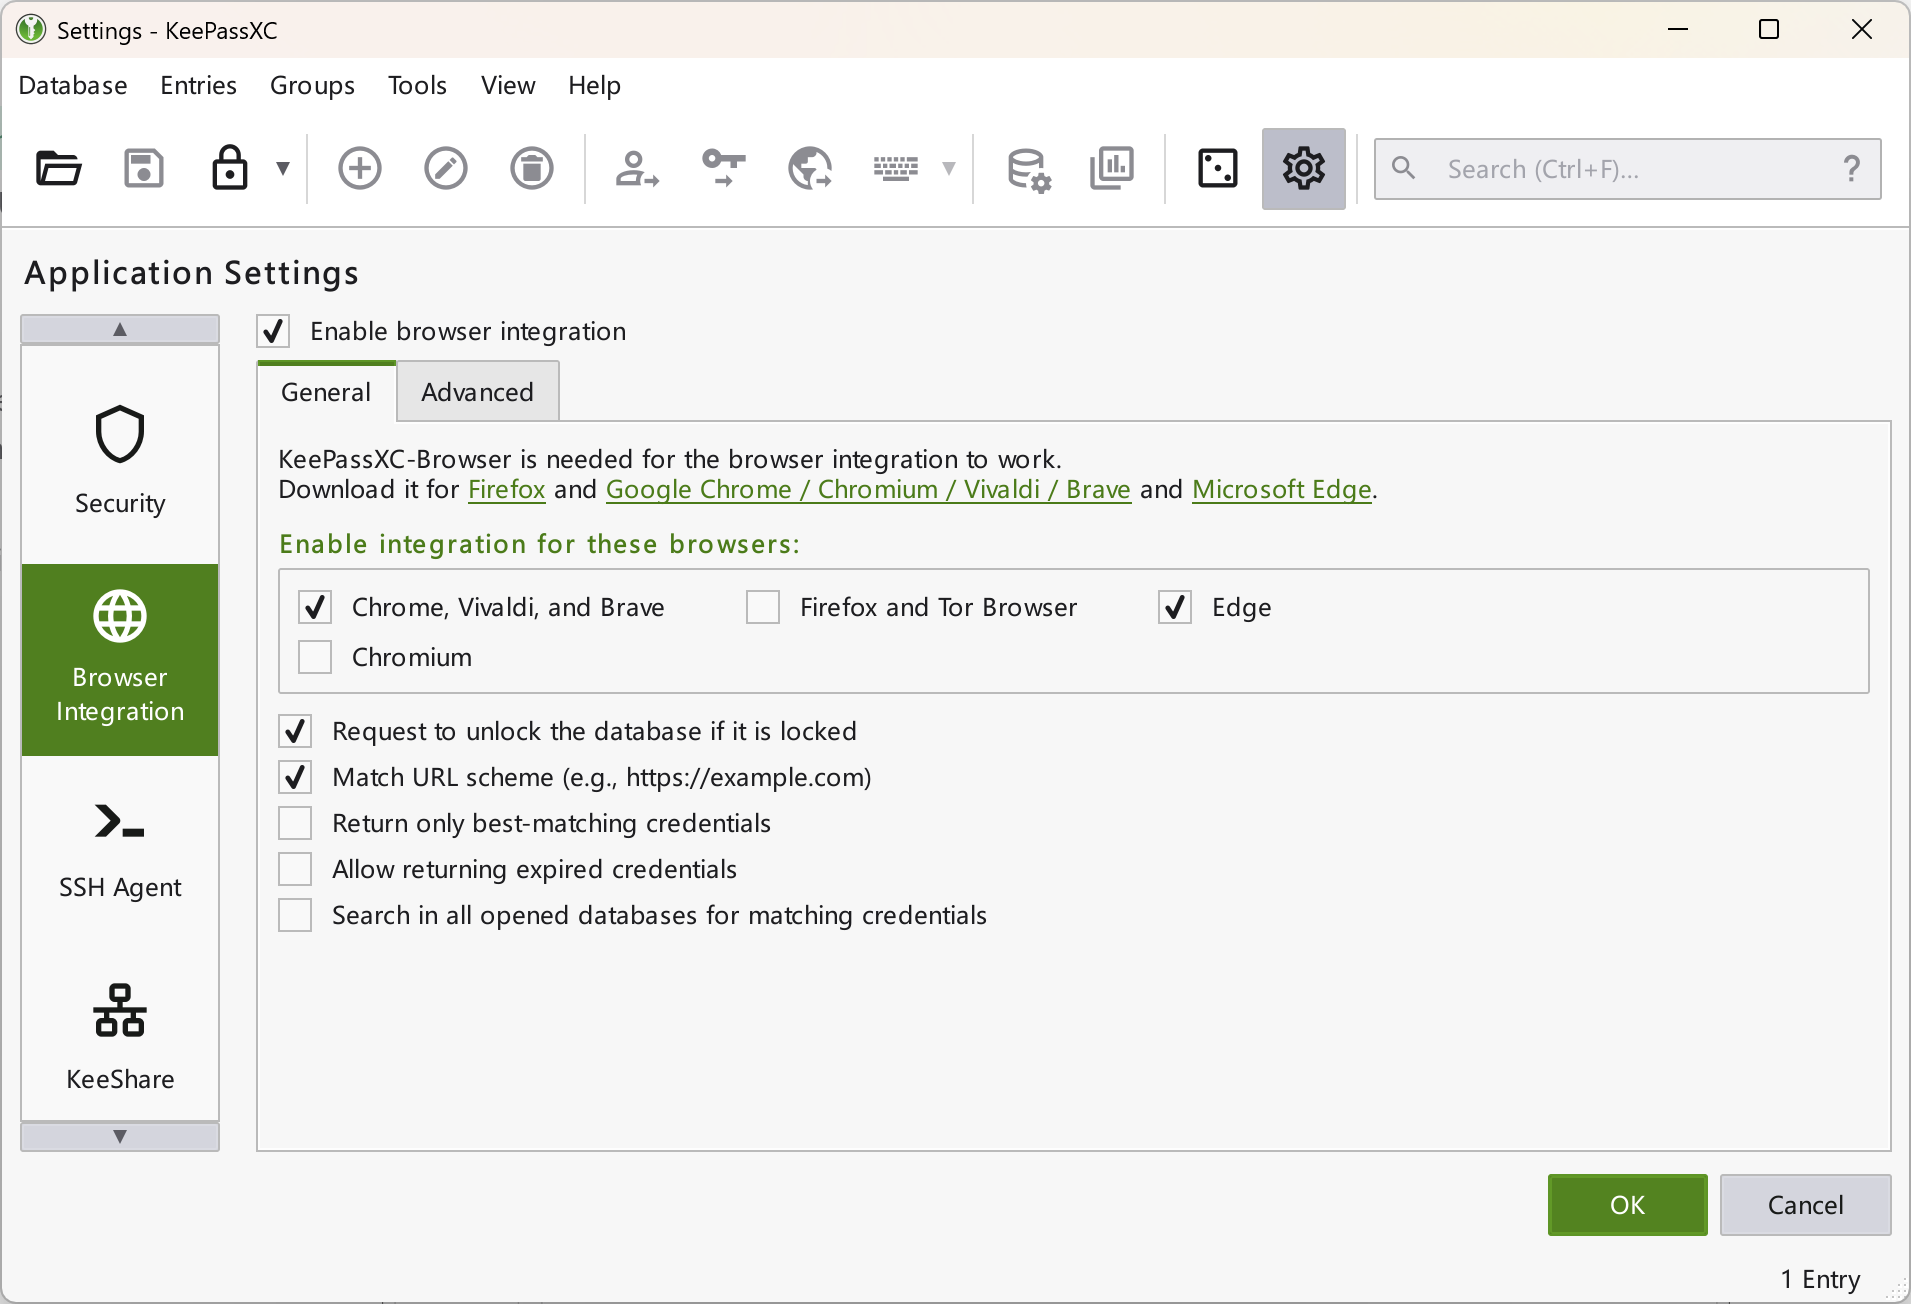
Go back to your browser, click the newly installed KeePassXC extension, and click Connect. Enter a name for the browser. When KeePassXC turns green, the extension is successfully connected. Now, when you fill in passwords in the browser, you'll be prompted to save them to KeePassXC.
Disable Screen Capture Protection
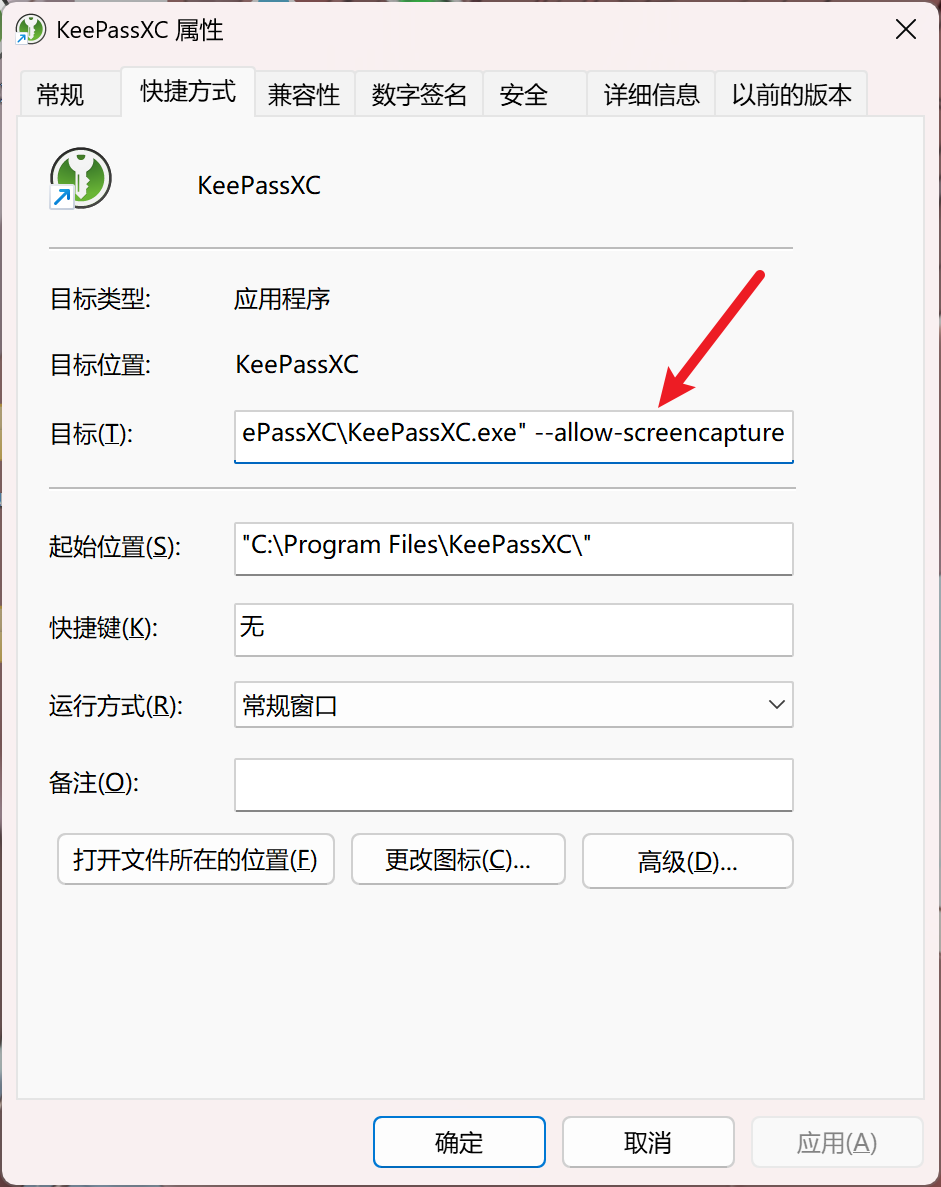
KeePassXC enables screen capture protection by default. When taking screenshots, recording, streaming, or remote controlling, the KeePassXC window will appear black. Sometimes you may want to temporarily disable this feature, such as when writing a tutorial.
To disable it, simply start KeePassXC with the --allow-screencapture parameter. Find the KeePassXC shortcut on your desktop, right-click and select Properties, and add the parameter at the end of the Target field. If the path contains spaces, the path will be in quotes — make sure to add the parameter outside the quotes, after a space.
Reference Entries
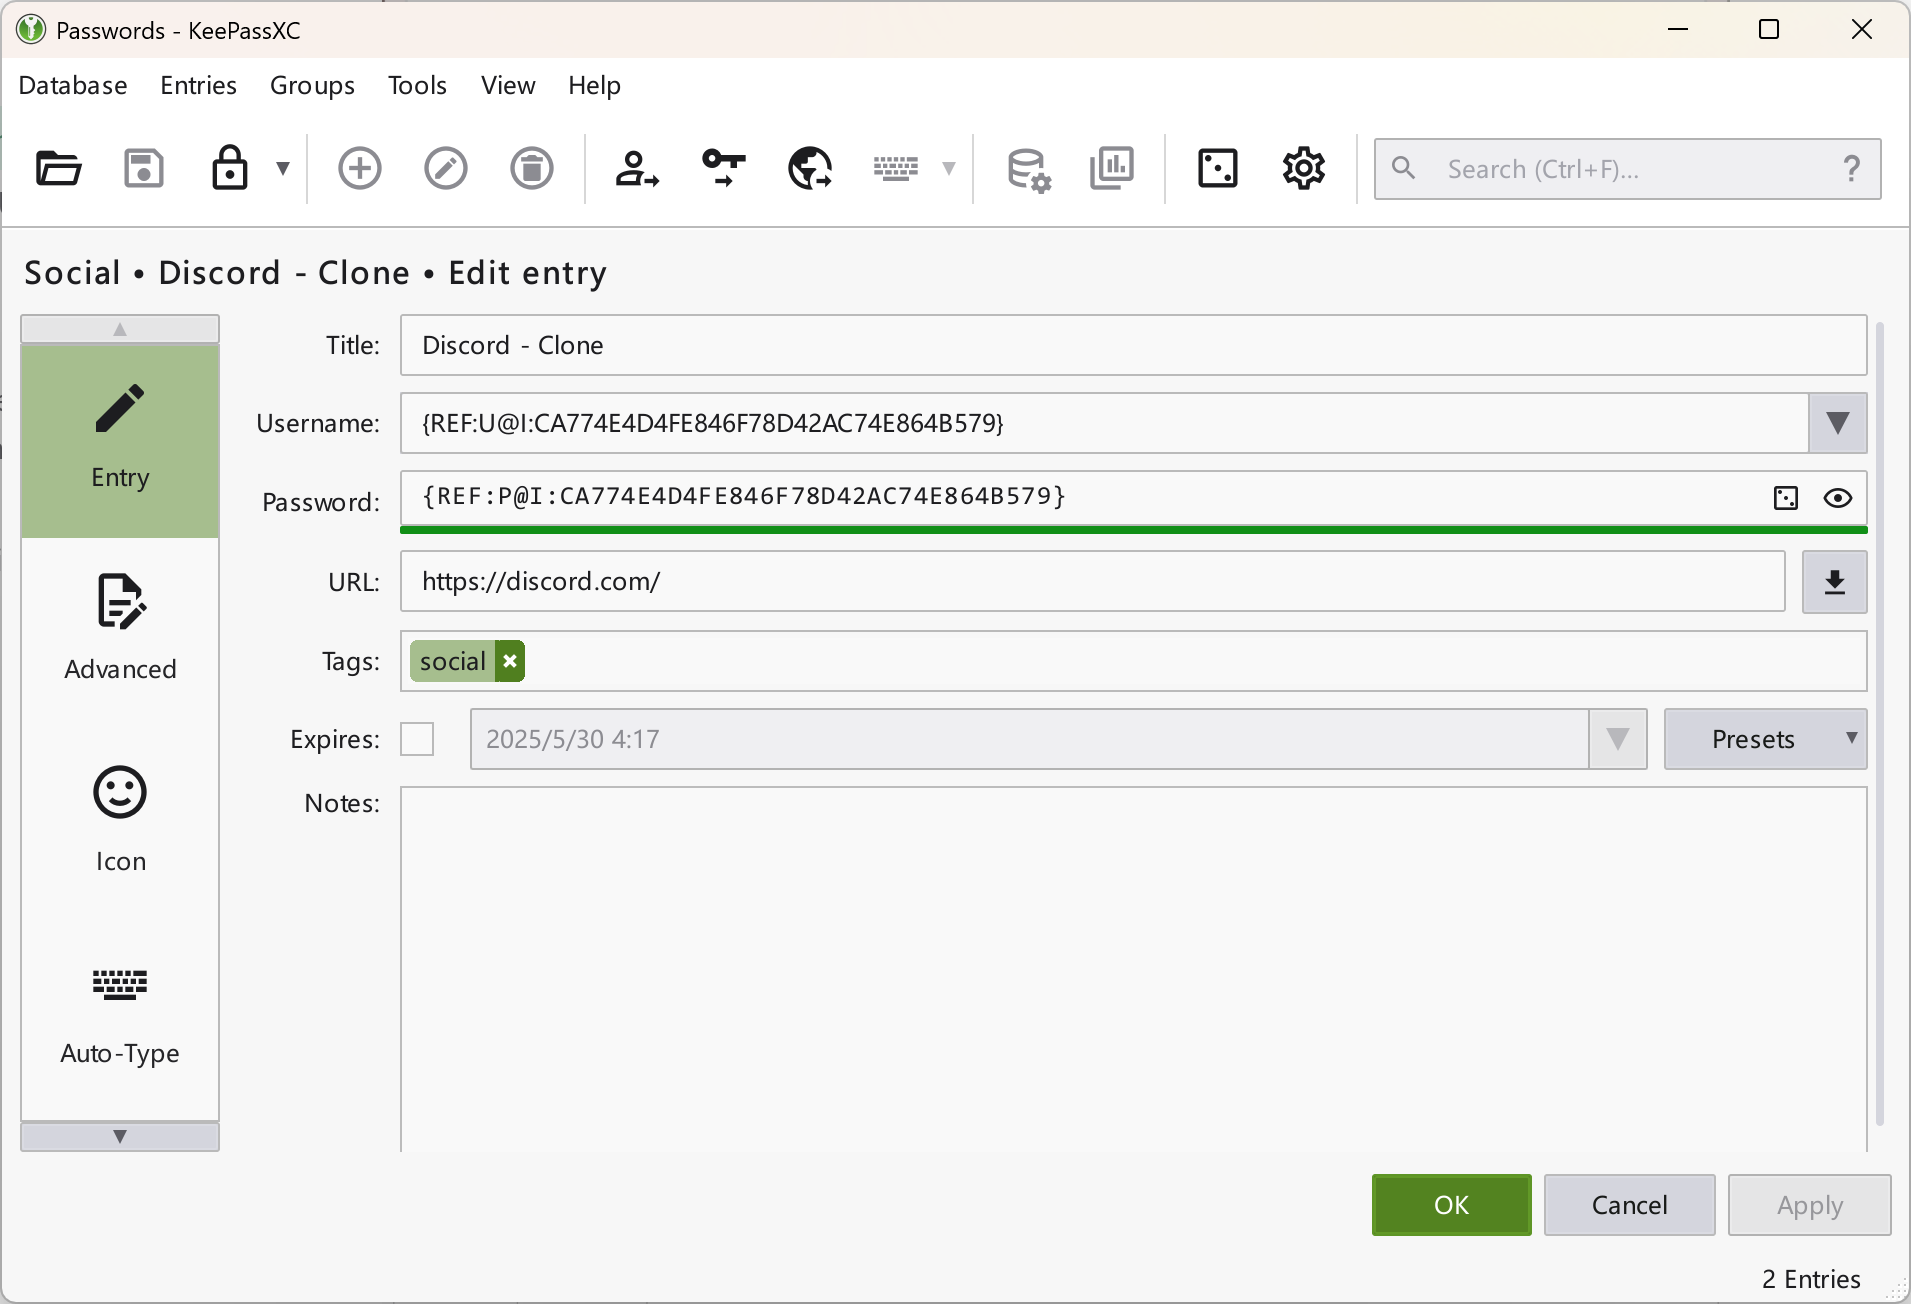
Sometimes you need to use the same username or password in multiple URLs or programs. Maintaining multiple identical entries is cumbersome. KeePassXC provides a reference entry feature to solve this.
Right-click the entry you want to copy, then click Clone Entry. In the dialog, check Replace username and password with references and click OK. Modify the cloned entry as needed; note that its username and password are references and don't need to be changed. Changing the original entry will automatically update all references.
TOTP
Some websites support TOTP-based two-factor authentication, and KeePassXC can also store TOTP secrets.
When enabling two-factor authentication, the website usually provides a QR code or secret. Right-click the entry, select TOTP → Set up TOTP, and paste the secret from the website into the Secret field, then click OK. You can now get TOTP codes from KeePassXC. If the website only provides a QR code, you can install the Authenticator: 2FA Client extension in your browser, scan the QR code and then retrieve secret from it.
Warning
TOTP codes are time-based. Make sure your system time is accurate, or the codes won't work.
Add More Attributes to Entries
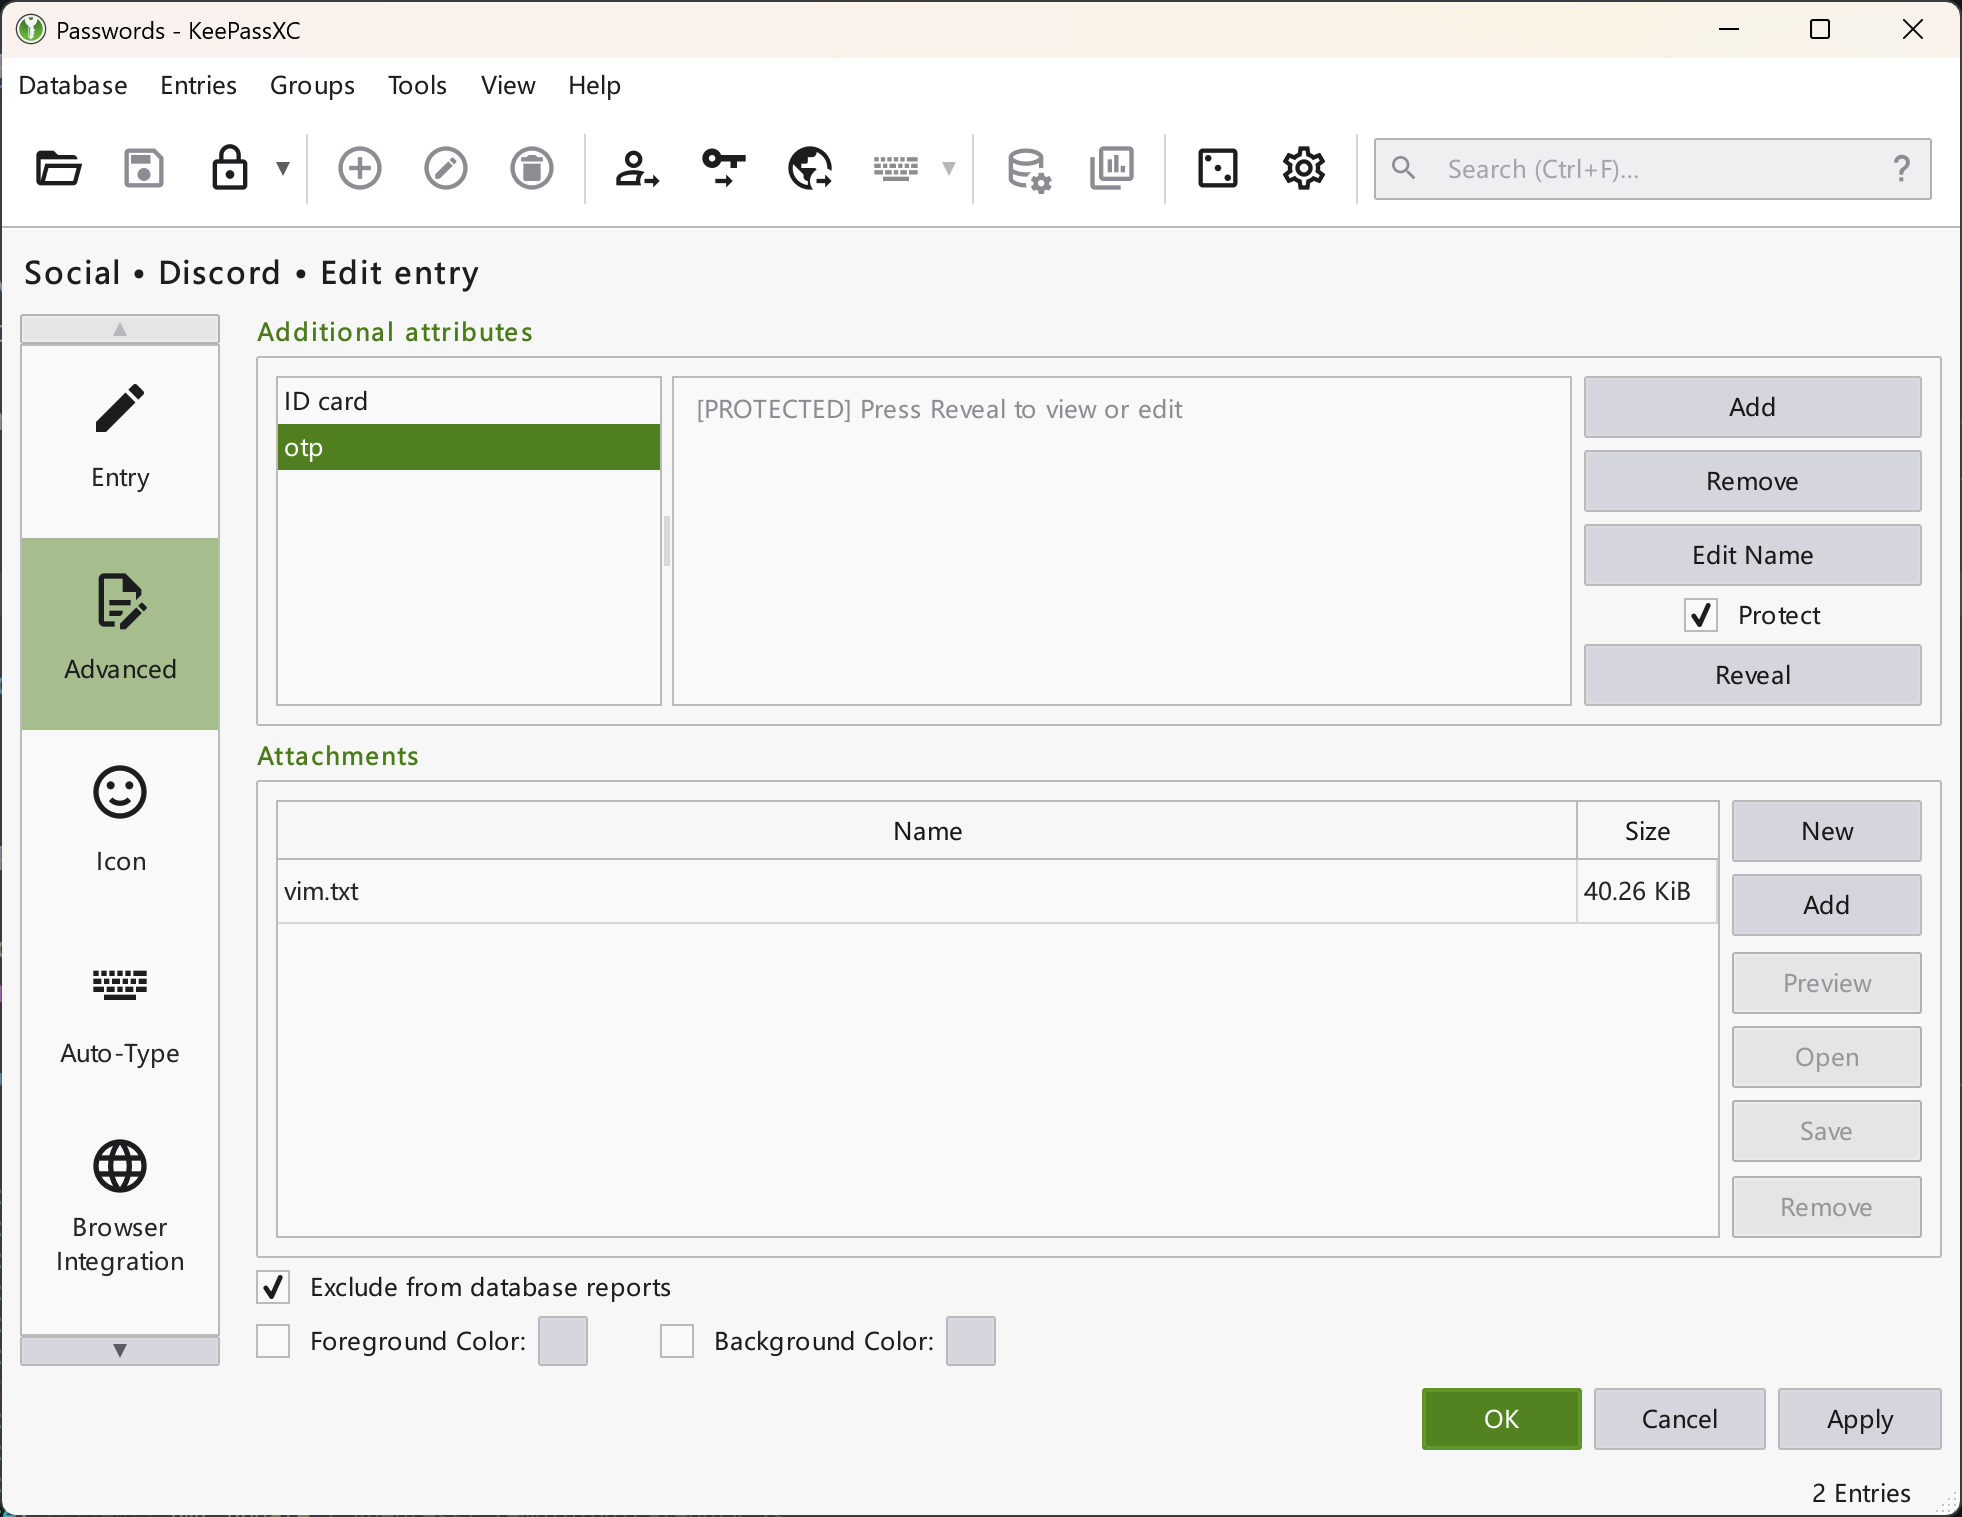
Previously, we only filled in the basic fields for password entries. If your account needs to store more attributes, KeePassXC supports this as well.
When editing an entry, select the Advanced tab on the left to access more detailed fields. Here you can add more account-related information. If you need to keep information confidential, check the Protect box to hide it. To view hidden information, click the Show/Hide button below the checkbox.
You can even add attachments, such as images of documents in the entry. KeePassXC can save them for you.
Other Settings
KeePassXC has many configuration options you can enable as needed.
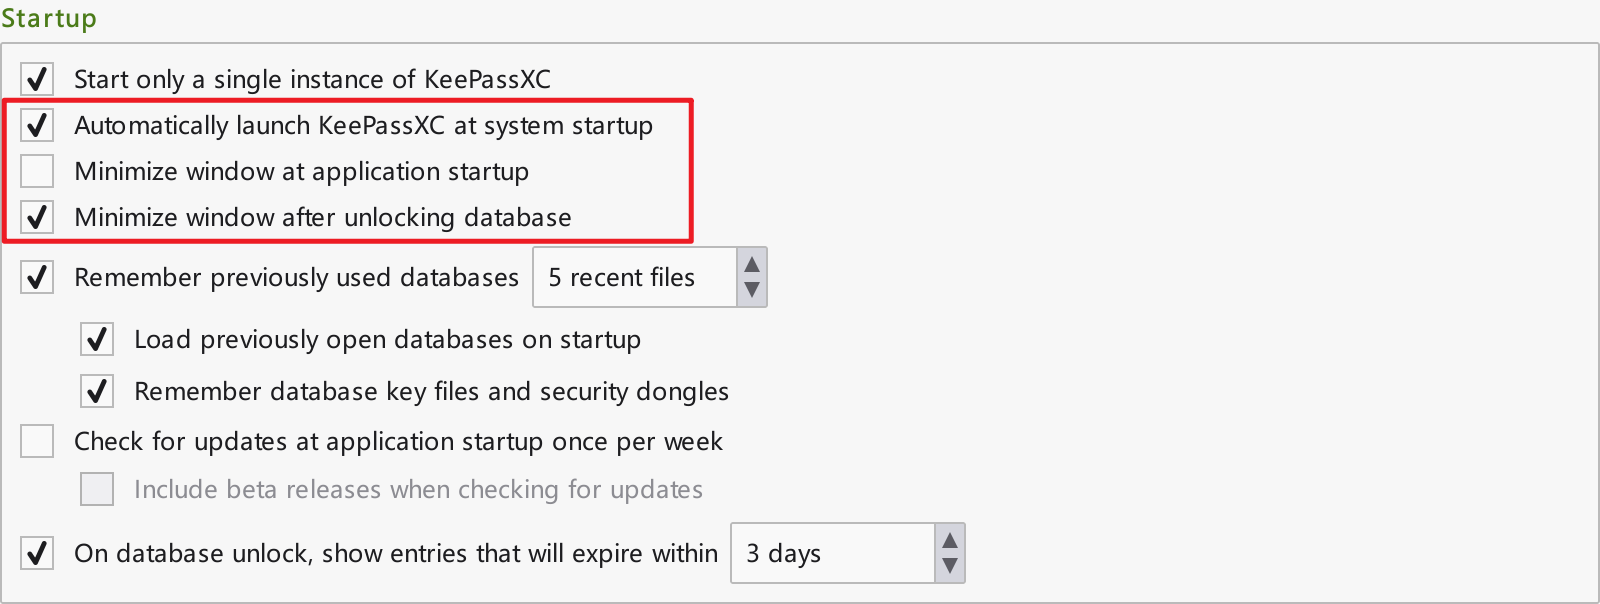
To optimize startup behavior, select Startup and enable Automatically launch KeePassXC at system startup and Minimize window after unlocking database.
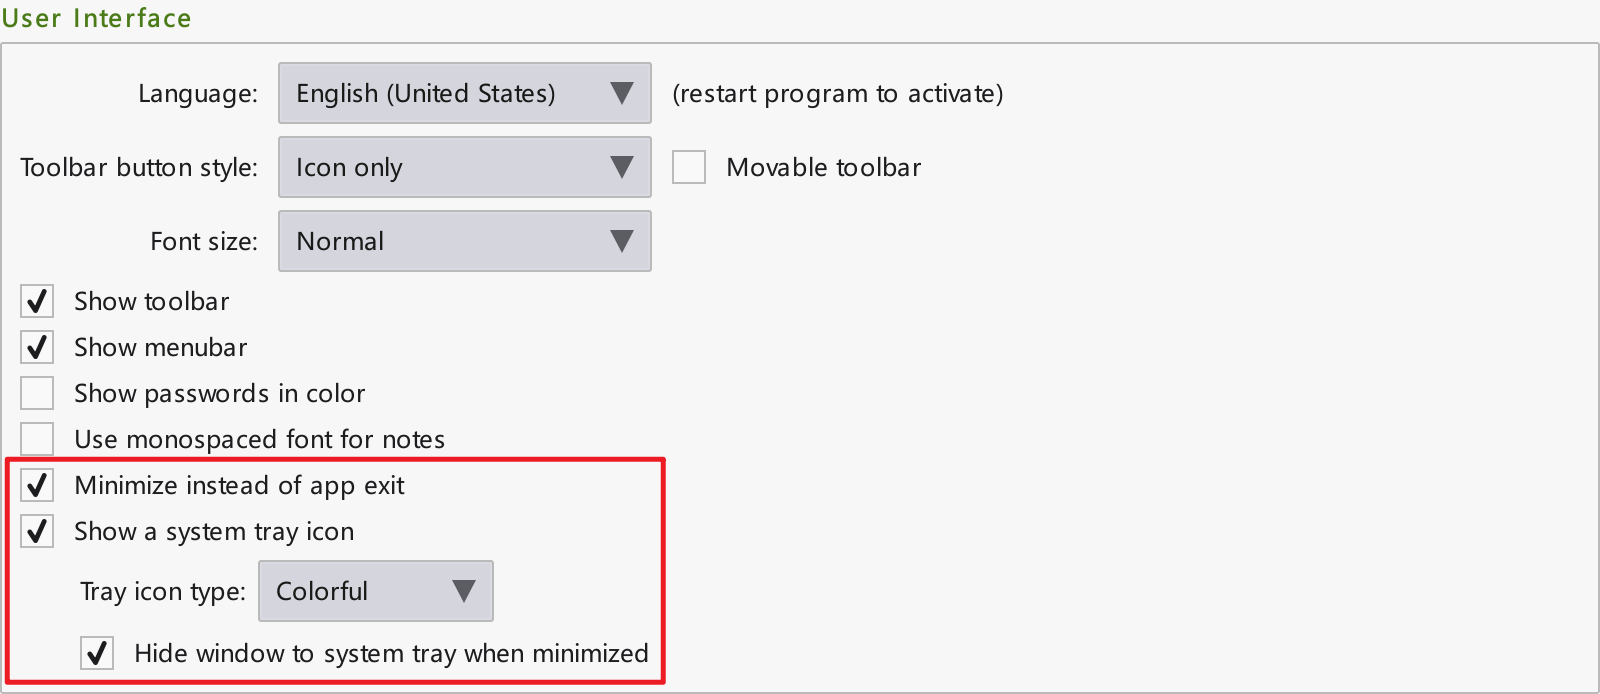
Clicking the close button will exit KeePassXC by default. To keep it in the system tray, enable Minimize instead of app exit, Show system tray icon, and Hide windows to system tray when minimized under User Interface.
If your system supports Windows Hello or Touch ID, you can enable Quick Unlock. Next time you unlock the database, you can use fingerprint or facial recognition instead of entering a password.
Run as Administrator at Startup
By default, KeePassXC starts with normal privileges and cannot perform auto-type in windows running as administrator. To use auto-type in such windows, KeePassXC itself must also run as administrator. However, KeePassXC's built-in auto-start only runs with normal privileges. To run KeePassXC as administrator at startup, use Task Scheduler.
First, disable KeePassXC's built-in auto-start. Then, open an administrator Command Prompt or PowerShell window and run the following command to create a scheduled task for KeePassXC. Replace KeePassXC.exe with the absolute path to KeePassXC. If the path contains spaces, enclose it in double quotes.
schtasks /create /tn keepassxc /tr "KeePassXC.exe" /sc ONLOGON /rl HIGHESTAfter creating the task, run the following command to start KeePassXC. If it opens successfully, the scheduled task was created correctly, and KeePassXC will auto-start next time you log in.
schtasks /run /tn keepassxcIf nothing happens, the path to KeePassXC is incorrect. Delete the task and recreate it.
schtasks /delete /tn keepassxcSummary
Through the above introduction, I believe you should now be familiar with the various usage methods of KeePassXC. I believe it will bring you great convenience in password management in the future. I will also continue to share various tutorials in the future. See you next time!